Saturday, March 31, 2012

Creative Chemistry 101 Day 9 & 10


 These tags are  the final tags of 
and you can still enter the class and have
a lifetime access to all the videos and pdf's.

It is really worth your $ 35,- for all the information
you get and all the techniques you learn to do, 
I have enjoyed being part of this immensely
and can recommend it warmly to all of you.
Thanks so much Tim for all your teachings
and Mario for behing behind the scenes. 

Day 9
Perfect Pearls
 Tag #1
Perfect Distress Mist Technique
It makes a beautiful background.

Tag #2
 Perfect Distress Technique
This is a technique I surely will do again for the glimmer
and shimmer on this tag is absolutely beautiful.
The stamp used for this tag is by Club Scrap.
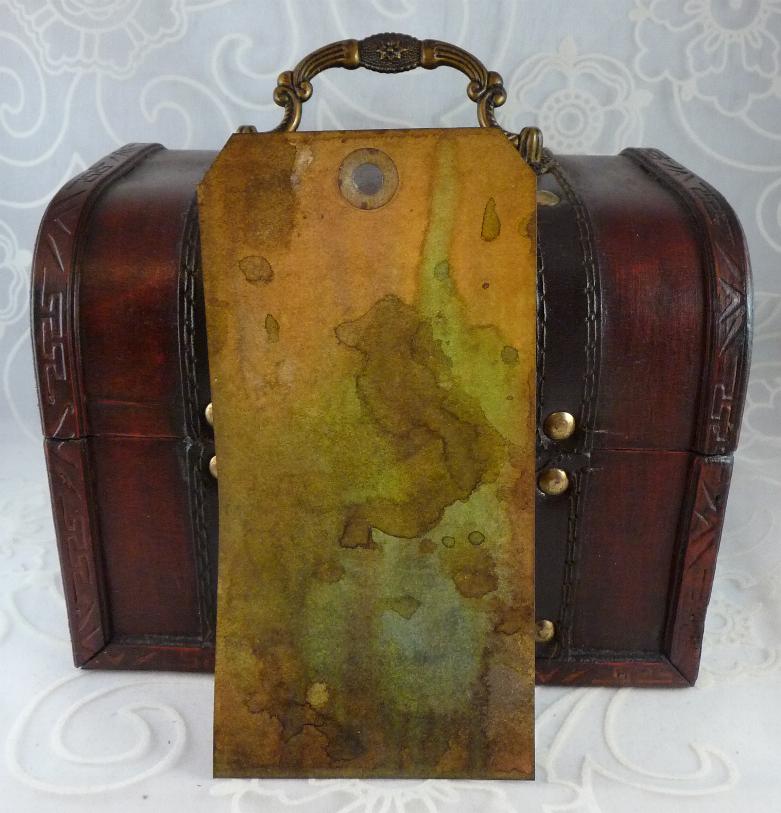
Tag #3
 Perfect Splatter Distress Technique
Another beautiful background technique with
a shimmer in the distress stains. This tag
looks like some rusted piece of metal. So very vintage.

Day 10
Dimentional Medium
 On the last day, there was just one tag, but it is a
beautiful one. The stamp  used for this one is Victorian
Lace by Stampin'up!.
Have a creative day!

Create with TLC March Blog Hop

 Welcome to the
This is a circular hop, so where ever you start, you
should see all the blogs and can grab all
the FREEBIES.
I hope you came over from the CTLC blog
to see what I have for you to play with.
 I have a card and a technique for you and you can 
grab the image below. Just click on the picture
and save it to your own computer.
On my card you see a firework like background
that I made with distress stains.
It is a technique that is called "Bingo Blast".
 You take the colors of distress stain you like
and unscrew the lid.
 Use the cushion of the bottle direct to the paper.
Don't do it softly, do it with a burst. 
This way you get the splashes.
 As you see I did it with 2 colors, 
but you can do it with any number you want.
Here is the finished background I used for the card.
Of course you can do it also on black paper!
Yes, there is picket fence and you can see what I
made HERE.

Hope I gave you some crafty inspiration, but there is more
for you to see and to grab.
Go over to the wonderful blog of my friend 

Marsha

with het Stamping Down South Blog

ENJOY!

PS. if you want to make a paper hat,
here are the folding instructions:
(click on picture for larger version)
Have a creative day!


Friday, March 30, 2012

Creative Chemistry Day 8

 Day 8 is all about PAINT in
the online class by Tim Holtz

I just love the look and feel of these tags.
I seem to have a theme in these tags
today: butterflies. These stamps are all
by Club Scrap from the Papillon kit.
 Tag #1:
Paint Dabber Resist Technique
This tag is made on sticky back canvas and it just looks
wonderful. It is a pity this does not show on the picture.
 Tag #2
Crackle Paint Resist Technique
After doing the first tag, I just had to try it again in a
lighter version. I love this technique. It has an awesome
look to it.Sure going to do this again. Very grungy.
 Tag #3:
Shattered Stains Technique
This is absolutely awsome. It really does look like
glass. In the background i stamped a branch and used
a white distress marker. Wow does it show!
Have a creative day!

Creative Chemistry Day 7

Day 7 of the CC101 Class is all about 
EMBOSSING.
Tim Holtz is teaching is all about the different
powders and how to use them.

It is hard to see the embossing on the tags, but I assure
you it is there!
Tag #1
Nostalgic Batik Technique
I used my rather new Valentine Stamps for this
beautiful technique. The XOX are die cut letters
that I thoughtgave the tag a finished look.

Tag #2: 
Rusted Enamel Technique
Doesn't this tag just look like a piece of metal?
I love this for a background, so cool!!

Tag #3:
Distress Powder Resist Technique
This tag is done with old paper distress embossing powder.
I never liked it too much, but now that I know more
about how to use it, I might even start liking it!
 
Have a creative day!


Thursday, March 29, 2012

Creative Chemistry 101 Day 6

 Day 6 from the online class by
is all about Distress Markers.
Now I just have 9 markers ordered (sets are not yet
available over here) and they came today.
So on to the tutorials in  the
Tag #1
 Watercoloring with Markers Technique
I thought the tag was so empty,
so I added some stamping on the side.
 Tried my first card with the markers.
Looks great on watercolor paper.
I like the soft tones.
 Tag #2
 Blending with Markers Technique
Also added some stamps to make the
tag less empty.
Tag #3
Stamping with Markers Technique
Thise tags is stamped on the new Ranger
stamping paper. I love the look and feel of it
so I had to make another one because
this technique came out so nice.
Have a creative day!


Wednesday, March 28, 2012

Blog Hop soon!

You must know by know that with
I always have a little tutorial for you,
 so do come back for more on the
31st of March 
and don't forget
the freebies
Today I have a fun background technique for you
called: Bing Blast

While doing the Creative Chemistry 101 class with Tim Holtz,
we learned a lot about the use of Distress stains.

But not this, so i want to share with you how to create 
an easy background with distress stains.
You just open your stain and trow the sponge onto
 your paper and you get this fun looking blast.

Now you can do this with all colors.
Usually it is hard to get something on black,
but with picket fence in the market you can create
wonderful black and white backgrounds (for Christmas???)
(for larger version click on picture)
 I used the image from the blog hop and a sentiment from Create with TLC
and doodled some flowers from Stampin'Up!

Hope to see you again soon!

Have a creative day!

Tuesday, March 27, 2012

Creative Chemistry Day 5

As the Creative Chemistry 101 class is moving along,
I seem to fall behind. Not only because there is life to live as well,
but because not all my projects look how i think they
should look and i keep trying to get it ok.

BTW did you know that you can still enter the class if you want?
And than you have a lifetime of watching all the videos and
trying the techniques.

The 5th lesson Tim Holtz is teaching us all about distress stains.
Tag #1
Working with distress stain on kraft resist paper.
That is just a wonderful technique and this is the result
of my playing with some of the sewing stamps.


Tag #2
Working with the white "picket fence"distress stain.
It was not quite what I expected. Even though iIdried
ot pretty quick, id did not show up as crisp as I thought it would.
The right one was the first one and I did not like it much,
but the left one came out much better.

Tag #3
A marbeling technique with the distress stains.
This way one can create a wonderful background.
Have a creative day!

Saturday, March 24, 2012

Easter inspiration

 Besides making tutorials for the on-line classs,
Tim Holtz also has a fun
 project on his blog  for Easter.

After reading all the instructions, I made this card and 2 tags.
 It is super easy and so much fun to do.

For the card I used the  cloisonne egg stamp by
the chicks are made with a punch
and everything else is Tim Holtz.
For the tags I used also some subway art and a sentiment
(Click on the image and see a larger version)
 Subway Art by Create with TLC.

The  bunny is covered with fuzzy material
and the bow is colored with blue stickles.
The sentiment is printed with the computer
on kraft paper.

(Click on the image for a larger version)
Again the Easter egg by Michael Strong.
Doesn't it all look yummy?
Have a creative day!