Pages

Friday, July 30, 2010

Kaarten ( Cards) á la Michael Strong

Deze kaarten zijn gemaakt met een techniek, die je terug kunt vinden op het blog van Michael Strong (Hand painted cards). Er staat een uitgebreide beschrijving en foto's van deze techniek. Je hebt er wat kwasten en je acryl verf voor nodig (en natuurlijk kranten eronder tegen het kliederen). Deze kaarten zijn gemaakt met Club Scrap papier (Artifacts) en de kraanvogel stempel van Michael Strong.
These cards are made with a technique you can find on the Blog by Michael Strong (Hand painted cards). You find a complete discription and pictures of this technique. You need some acrylic paints, some brushes and some newspaper to keep your table clean. These cards are made with Club Scrap papers (Artifacts) and the crane stamp by Michael Strong.

Wednesday, July 28, 2010

Wacky Wednesday at FireCracker

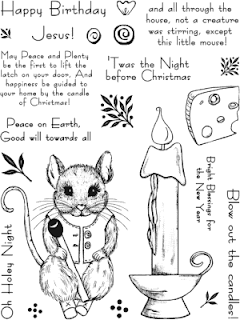
Wacky Wednesday at Firecracker by Designs means that another set is at 50% sale for 24 hours. This time it is the set "Oh Holey Night" (see picture below) and some inspiration can be seen here:

and because I do not have this set, I have something else to show you for inspiration.

Here is my oh so favourite template for the number card. This time the 2011 template is here for you.
Use your right mouse click to save the template to your computer, so you can print it any size you want.
2011 Christmas/New Year card

I have made these card for several years and you can see some others for inspiration here:
http://craftchaos.blogspot.com/2009/12/staande-kalender-kaart-standing.html

For the background of this card I used a tecnique from the August Technique Junkie Newsletter called
Worn Wallpaper. The images are all digital images by FireCracker by Designs( I want Christmas & Floppy Bunny and colored with copic markers. I have printed them in different sizes to make this scenery on the numbers.

Tuesday, July 27, 2010

Penny Black challenge 111

Momenteel ben ik helemaal in de auto's. De vorig zijn gemaakt met ponsen en deze auto is gemaakt met een die van SU!, maar je zou ook die van de nestabilities kunnen gebruiken. Nee, ik heb het niet zelf verzonnen, maar gevonden op internet. Hier staan de instructies:
De auto heb ik gebruikt voor de challenge op het Penny Black blog en deze keer was het thema, ja dat raad je zo: "Christmas in July". De koe en de kikkers zijn van Penny Black, de text stempel is van TMH Designs en de kerstbomen zijn van Stampin'Up! (Loads of Love).
At the moment I am totally into card and the previous one was made out of punches. But this car is made with the Sizzix SU! top note die. No, I did not come up with it myself, but found the instructions here:
I used this car to make my card for the challenge on the Penny Black blog, and you can guess the theme: "Christmas in July". The frogs and the cow are stamps by Penny Black, but the sentiment is from TMH Designs and the trees are from Stampin'Up! (Loads of Love).

Sunday, July 25, 2010

Auto kaarten/ Car Cards

Van een vriendin heb ik een leuk kaartje gekregen, met een auto erop (geheel gemaakt met ponsen). Nou is mijn man een liefhebber van auto's dus ik ben gaan speuren op internet, hoe ik die auto moest maken en ja hoor, natuurlijk gevonden:
Hier een aantal kaarten die ik nu gemaakt heb met Club Scrap Cruisin' papier en stempels.
Zijn ze niet leuk? Mijn man vindt in iedergeval van wel! Mocht je niet in het bezit zijn van alle ponsen, dan heb ik hieronder een patroon voor je getekend als je er ook eentje wil maken.


A friend has send me a card with this lovely car and because my DH just loves cars, I had to figure out how to do this. The car is made out of punch parts and I went on internet to search for an explanation and yes, I found it here:
Above you see some of the cards I made using Club Scrap Cruisin' papers and stamps.
Aren't the cute? At least my husband thinks so!
If you do not have all these punches, I made you a template, so you can try this too.

Wednesday, July 21, 2010

Wacky Wednesday at FCD

Today another cute set 50% off at Fireckracker by Designs. It is the Snow Lady Wreath set.
Do have a look around at all the other sets too.Fun new digital stamps too!
Please go to the Firecracker site to see some inspirational cards with this fun set.
See also Boni's Blog

As I do not have this set, I have some other inspiration for you. Here is a fun little present you can make for Christmas and add a little gift inside. I used the digital Poinsettias again on the top of the box and the clear stamp greetings set on the sides to stamp some good wishes.
Inside the box you can add some Christmas tea bags, eggnut or gluwein like I did. Even add a little candy in the middle. I am sure you come up with something to add in the box.
Below you see all the parts of the box and if you like the template and more info on how to make this cute
3 x 3 x 3 inch box, please click HERE for all the info (scroll down for English text).

Tuesday, July 20, 2010

Babybox

Dit doosje voor een kennis gemaakt en kan gelijk meedingen bij de challenge op het Penny Black Saturday Challenge Blog. De uitdaging was: änything BUT a card". Dus hier mijn surprise doosje met een patroon, dat ik gevonden het op Ebbies Blog. Ik heb een Penny Black babystempel ( 2073J Baby Hammock) gebruikt en een tekst stempel  van Club Scrap en een Martha Steward randpons. Het plaatje is gekleurd met copic markers en de bloemen zijn 3-d gemaakt met bovenop glittersteentjes, die ook op de strikjes zitten.
In het doosje zit als cadeautje babysokjes, en een beschuit met muisjes standaard met een kaartje.
Filmpje is HIER om te zien hoe het moet.

I made this babybox for a friend and also I can enter it for the Penny Black Saturday Challenge Blog. The challenge is: anything BUT a card", so I think this box will qualify. I found the pattern for this on Ebbies Blog (sory it is in Dutch, but I think with the pattern you manage). I used Penny Black Baby Hammock (2073J), sentiment from Club Scrap and a Martha steward border punch. The image is colored with copic markers and the flower made into 3d with little gemstones on top. Also on the bow there are pink gemstones. Inside the box there are 4 sets of baby socks and in the middle you find a little card on a cardholder that is a Dutch treat when babies are born.

I have learned that in English this is called an "explosion box" and you can google this word for lots of different templates. When you click HERE , there is one with a template ( so you have the dimentions in inches instead of cm!). And if you rather watch a video, click HERE.


Thursday, July 15, 2010

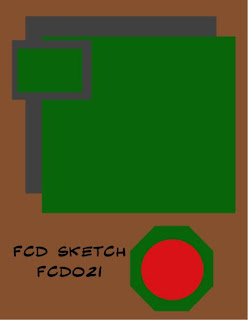
Blog Hop FCD Sketch

Welcome to the FCD Blog hop!
This is a “circular blog hop” where the only beginning is wherever you start!! You will know you are at the end of your blog hop when you’ve come back to the blog you’ve started from!
Here is my take on sketch 021 with FireCracker Designs digital stamp: Mother's Bouquet.
I colored the flowers with copic markers and added some gemstones in the heart of the flower.
The background is a piece of scrap paper.
The sentiment is also digital and after printing it I made it into a ticket.

Here you can see how  you can make a ticket;
You need these two punches and a piece of rectangle paper of your choice of size.
Mark the middle of the short side of the ticket,
First use the corner punch on all four corners.
Now you take the circle punch and on the marked spot, you go in with half of the circle and punch.
Do this on both sides.
Finish the ticket by stamping a sentiment on it and you can also draw some lines and sponge the outside to give it a worn look.

**To find out if you’ve won… you will be contacted by Pamela via e-mail (so be sure to leave it with your comment.) and you can also find out on Pamela’s blog after the blog hop ends on Mon, at 8:00 PM (EST).**

Now, to continue the circle, you will need to hop on over to  Cat's Blog and keep going until you’ve come back to where you’ve started! Thanks so much for playing along with us and we hope you have a great time!

Wednesday, July 14, 2010

Another Wacky Wednesday at FCD

Yes, it is Christmas sale at FireCracker by Design and today it is: Let's Celebrate. Half price!
More inspiration can be found at Boni's blog and Karyn's Blog.
As I do not have all the sale sets, I do have some inspiration for you. I have used FCD digital Poinsettias and Michael Strongs pot stamp for this Christmas decoration, which you can also send as a card.
What do you need: some red cardstock 5,5  x 5,5 inch folded in half and a strip of 5,5 x 2,5 inch, folded in a W ( first in half and then both sides up again).

A plain circle and a scalloped one (I used my nestabillities, but you can also make them with your cricut or punches). The middle line of the silver circle is 3 inch.

Print and color the poinsettias (when you want to make them 3d, you need to print some extra's to cut out).
Stamp and emboss the pot stamp (I stamped on some green magaxine paper).

Some strips of paper for decoration ( green 5,5 x 2 inch and red dotted 5,5 x 1,75 inch) and a piece of ribbon if you want.

Take some double sided tape and tape it to the outside of the W-shaped strip. Take only the cover of one side off and glue it down and then do the other side. This will make it easier for you tomposition the strip.

Assemble and decorate the card as desired. You can use this on your table as name cards, but you also send it in an envelop as you Christmas cards.

(detail picture of the flower)

Tuesday, July 13, 2010

Blog Candy Dutch soccer team

We hebben dan wel niet gewonnen, maar een tweede zijn van de hele wereld is ook wel heel fantastisch! Ja toch?! Dus daarom toch deze blog candy. Wat moet je doen? Laat gewoon een leuk berichtje achter met daarin wel je email adres en dan loot ik op zondag 18 juli een winnaar. En wat kan je dan winnen? De nieuwe set ster stempels van Michael Strong, een ster irisvouwkaart met patroon en origami papier en de kaart gedaan met de ster stempel. Een heel pakket dus (helaas de leeuw blijft bij mij!). De sterkaart is gemaakt in Irisvouw techniek en antique wallpaper techniek van de Technique Junkies en papier van Club Scrap. Ben je vandaag niet bij de huldiging geweest, dan zie je hieronder een kleine impressie die ik met mijn fotocamera van de televisie heb opgenomen. Het was een reuze feestelijke dag!

Ok, so we did not win the World Cup, but to be the second best of the world is not to bad, right?! So I decided I will give away some blog candy anyway. What do you have to do? Just leave some nice comment and don't forget to leave your email address before the 18th of July. What can you win? Well, the new set of star stamps of Michael Strong, the irisfolding card with pattern and origami papers and the other star card you have seen a few posts before using Mike's stamp (the lion stays home with me!).
The irisfolded card is made with Club Scrap papers and the antiqued wallpaper technique by Technique Junkies. If you did not attend the celebration on the Museumplein in Amsterdam, I have filmed an impression for you with my photocamera from the television. It was quite a party!


And the WINNER is: Carole Miller!
Please contact me with your snail mail address.

Monday, July 12, 2010

Techno Stamper sketch 130

Vandaag de Techno Stamper sketch gemaakt met wat restjes scrap papier en stempels van Michael Strong.


Today I made the Techno Stampers sketch with some leftover scrap paper and stamps of Michael Strong.

Sunday, July 11, 2010

Daydream

Gaat het lukken? Ja het is een perfecte droom, maar nu moeten ze het nog even doen! Als er gewonnen wordt, dan heb ik morgen een mooie blog candy en moet je zeker terug komen en kijken wat dat zal zijn!

Deze pagina is gemaakt met Club Scrap Expressions papier en Michael Strong's ster stempel. Het shirt is gemaakt in de irisvouw techniek en de oranje tekst komt uit de krant van zaterdag.
Are we going to make it? Yes it is a perfect dream, but now they just have to do it. If the Dutch team wins, I do have some wonderful blog candy for you, so it will be a good reason to come back here.

This page is made with Club Scrap Expressions paper and Michael Strongs star stamp. The Dutch text came out of the newspaper and the shirt is done in irisfolding technique.

Saturday, July 10, 2010

Oranje Droom/ Orange Dream

Sorry hoor, maar ik kan deze dagen nog alleen maar aan oranje denken! Gek he, of niet? Gaan we winnen?
Ja aan ons Nederlanders zal het niet liggen, dus jongens: Ga er voor jullie zijn allemaal sterren! "Onze sterren"!! En daarom heb ik maar weer een kaartje voor jullie gemaakt met de nieuwste stempel van Michael Strong en een tekst van Sweet 'n Sassy digitaal. De ster is gestempeld met memento inkt en ingekleurd met copic markers.
Sorry, but I can only think orange these days. Must be crazy, but with a world soccer championship in sight, this is all I can think of. Not only me, all of the Dutch people. All "our boys" are stars and we think highly of the playes, so boys: go get them! I made this card for you, to support you.
It is made with the newest Michael Strong star stamp and a digital sentimen by Sweet 'n Sassy. The star is stamped with memento ink and colored with copic markers.

Thursday, July 8, 2010

Frame en irisvouwen/ Frame and irisfolding

Irisfolding is a technique that intrigues a lot of people. But when you know howt, it is so EASY! On my blog you have seen many samples, but here is another tutorial on how to do it. You don't need anything special.
I used:
Michael Strongs frame stamp
Card paper from Paper Temptress
folding paper from stash (origamipaper, wrapping paper, glossy magazine paper all will do as long as it is thin and not heavy paper - printer paper in color is great)
just ordinairy cellotape
and things like a pencil, double sided tape, scissors, craft knife and ruler.

For this pattern, you need 4 colors of folding paper. You cut them into strips of 1 inch (2,5 cm).

Take each strip and fold it lengthwise (hotdog fold).

Print the folding pattern. Make sure it fits the rectangle of the stamp.
(Save the pattern to your computer by first clicking on it and than use the right mouse button on the pattern to save it on your pc for printing)
Stamp and emboss (in gold) the frame stamp of Michael Strong. Cut out the middle rectangle with a craft knife and ruler. or cut with scissors.

Tape the pattern to your table or craft surface. On top you tape the frame with the
FRONT (embossed) side towards the table!

On the pattern you see numbers.
1-5-9-13-17-21-25 color A
2-6-10-14-18-22-26 color B 
3-7-11-15-19-23-27 color C
4-8-12-16-20-24-28 color D

Take the first color and cut the strip so it coversfrom side to side over the pattern. You lay it on top of the pattern and the frame with the folded side along the line of nr 1 and tape it down with cellotape.

Just follow the pattern: color B at 2, color C at 3 and color D at 4.

This is how it looks at the front side of the card.

Now you take color A again on 5, B on 6, C on 7 and D on 8.
Go on like this.

It should look like this on the front side of your card.

When you have finished with all strips, there is still one whole in the middle left.

Now your work looks like this:

Now you take a piece of holographic paper or you can stamp a word on a piece of paper and add this.

I like the holographic paper and you just tape it to the back of the card, covering all of the whole.

Use some double sided tape to add your irisfold to the card.

Here is the finished card.