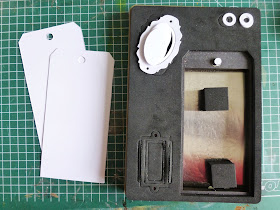
Start with cutting out a label from
white cardstock.

Next you emboss your tag with a star
embossing folder. Leave the top part
of the tag out.
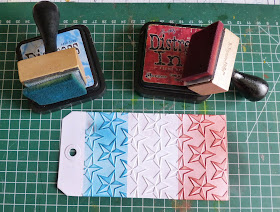
Devide the embossed part in three
equal parts and put a piece of post it note
on the middle part.
Take red and blue distress ink and your
blending tools.
On one side you colder the embossed part with blue
and on the otherside you color the embossed
stars with red.
When you take away the post
it note, this is the background you have created.
For the next step you need a piece of
watercolor paper and your distress markers.
First you stamp the mini cloisonné
stars by Michael Strong in black archival ink
and then you start coloring the
inside of the star with the markers.
The girl on this tag I a freebie I found
online by Anna Stillwell. You can use the colored
picture or color it yourself.
Go here for the free image:
On top of the tag I stamped Happy
and on the botom I used Michael Strongs
number 4 again. This time also
stamped with black archival ink
on the watercolor paper and colored with
a blue distress marker.
To finish the tag take some red white and blue
ribbons. I used some organza ribbons from
the Action shop in The Netherlands.
Hope you are happy with all the instructions.
Any questions?
Feel free to email me!
Have a creative day!


Your 4th of July Tag is so cute Hetty!! Thanks for the tutorial and for sharing your creativity!!!
ReplyDeletehugs,
Laura
Thanks for showing how you made it. Looks easy enough,lol. Great folder of the stars.
ReplyDeleteYou had me at the background! Love the embossed stars, but then you color striped them...LOVE!!!!! Gorgeous tag!
ReplyDeleteDarling tag Hetty- love the great background technique and the coloring on the stars!!!
ReplyDelete