On the last day of this short month
the Club Scrap
Artist Team has some stenciling for you.
All of us share with you ideas of how
you can make use of the letter stencils.
The start of the blog op is at the
Club Scrap Blog
and you can see there not only the
list of all the participants, but also
that the stenicls are 50% off!! YEAH!!
You find the stencils HERE.
Lower Case
or Upper Case? Or both!
Hope you have arrived here from
Pam's Blog
and are now in for more ideas.
I have made a scrapbook page and a card for you.
For all my projects I used the Club Scrap
February kit Succulents that was still on
my table from the blog hop. Hope you had a
look at all those fabulous projects here.
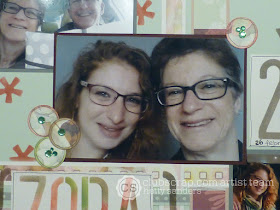
The scrapbook page has pictures from last Sunday,
when it was my youngest daughter's birthday.
I used 3 colors of ink for my page: ruby, onyx\and moss.
With these 3 colors i colored the name of my daughter.
I used post it notes to comer other letters, so I would not
smidge the page on wrong spots.
This is how it looks after coloring all the letters.
And this is how it finally looks on the scrapbook page.
For the background on the page, I used some of the
cut apart strips and made this weave on the page.
I put tape only on the edges, so I could weave them in the middle.
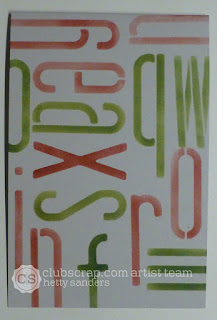
Then I used one of the stencils to create a fun background.
And you see I did the number the same way as the name.
Do you notice the coincidence of the date and the age?
It can only happen once in a lifetime!
The cut aparts had also these fun 1" circles that I cut out
and used as a kind of flower and decorated with
a few sticky gemstones.
I just love my Succulents kit and could
not resist ajusting my plants and make
a matching card. So how about one
with the alphabet stencil.
And this is my card idea:
creating a background with the letter stencils
by using the letters as a decorative element.
Also on top using one of the succulents rubber
stamps. The outline is drawn with a black micron
marker, to make the text stand out.
These are some of my ideas, but there are many more
and Jennifer is sharing hers on her
Thank you for looking
and have a creative day!


Love the way you created the multi colored titles and art, awesome!!
ReplyDeleteGreat way to mix up the stencils!
ReplyDeleteHetty Super fun Layout & card! Beautiful job with the stencils!!!
ReplyDeleteHugs
Cheryl
Wow! Your stenciling is incredible. I really like the variegated-coloring stencils. All-around goodness here, Hetty!
ReplyDeleteSuper layout and card! I love how you used the other punctuation marks from the stencil to make artful backgrounds. TFS!
ReplyDeleteLove all your great ideas, Hetty!
ReplyDeleteWhat a great LO! Such a fun way to help celebrate her b-day. Love the card you made to go with the succulent gift! Very fun background idea.
ReplyDeleteFabulous multi-coloured stenciling Hetty, on a gorgeous page. All your projects are inspiring
ReplyDeleteBlessings
Maxine
Beautiful layout Hetty, love the colours and the stenciling AND the pen outlined stamp.
ReplyDeleteFaith
x
So many beautiful techniques. I love the paper weaving and multi colored stenciled image. Nicely done, Hetty!
ReplyDeleteBeautiful projects! Love how you used the stencils!
ReplyDeleteLilian
The Leaf Studio
Very nice pages and cards! Your stencil techniques are great!
ReplyDeleteLove the layered stencilling!
ReplyDelete