Sunday, July 31, 2011

Telefoon Kaarten/ Calling Cards

Deze kaarten heb ik gemaakt me digitale plaatjes van
in combinatie met rubber stempels van

These cards I made with digital images by
in combination with rubber stamps from

I made these cards with two sets
and

and the Club Scrap stamps
are from "Gimme a Ring"
(you see these mostly in the background)

and if you go over to the blog of
you can get the Happy Girlfriend Day
image for FREE!

You see you can make some fun cards
 with these imgages.
I am toally in love with them,
you will sure see them again!
Have a creative day!

Saturday, July 30, 2011

TSSC 184

Here is the sketch from
an easy one and I like it a lot.
This is my creation:

Backfround encaustic and embossing.
The Coffe cups are by Michael Strong
and the sentiment and the coffee beans
(with glossy accent on top) are by SU!.

Have a creative day!

Friday, July 29, 2011

Create with TLC BLOG HOP

Today we have a wonderful Blog Hop for you
with images of
If you hop along all the blogs,
you can get a free image on every blog
Just click on the image below
and save the image with
a right mouse click and safe as...

I am cooking up some fun cards for you
and also added a little tutorial!

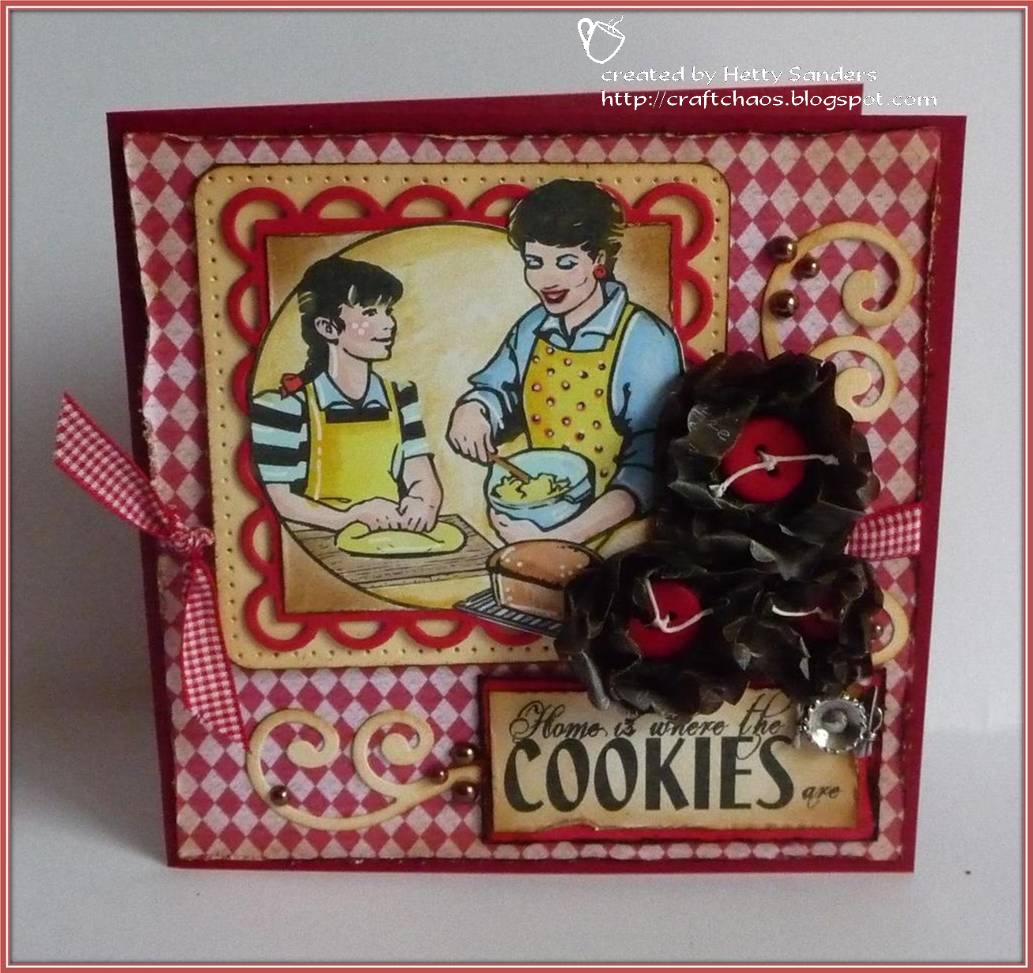
This is the finished card with the free image.
You can use it on a recipe scrap book you make,
on your scrapbook pages,
or even on your recipe card.

I colored the image with copic markers, cut it to the
size I wanted and inkted the sides with vintage photo
distress ink and matted it first to the red and also to the
yellow paper.

These vellum flowers I made by hand
and here is the tutorial.

This are the supplies needed:
vellum
scallop punches or spellbinder
needle or craft pick
background stamp and ink
button, brad of paper circle
floss

1. Cut out or punch the scalloped circles
For each flower I used 2 circles.
You can use more, but I did not want the flowers
to become to bulky

2. Because I use dark brown vellum I take white ink
to stamp with, also rub the sides.

3. Use pick to make the holes for the
floss (or waxed floss) to keep the
flower together.

4. Crumple the vellum and than straighten it again.

5. Thread the floss through 3 layers.

6. Finish the flower by knotting the floss and
mold the flower to your liking before adding it
to your card.

The sentiment for this card is from the set "Food for
thought" that you can find HERE.

I am sure you are hungry now for the other blogs
and see what delicious cards there is for you.
Here are all the other players:

Hetty (you are here!)
Have fun and you know:


Have a creative day!

Wednesday, July 27, 2011

Penny Black Challenge 161

Here is my card for the
with the theme
STARBURST

I used it to make a thank you card.
My "spoolin'around" mouse was perfect
for this card for I extended the thread
from the spool to make the star.
The star was embroidered with
embroidery floss.
The text I made with the computer.


Have a creative day!

Nieuwe plaatjes/ New images

has some new images,
and I got send one to make some art with.
It became a gatefold card.

The images are colored with copic markers.
Paper is from Basic Grey
and I also added some ribbons from my stash.

You can find the new images here:
and if you want to see  what a beautiful card
is made with the other image
please visit Jennifer's Blog.

Have a creative day!

Tuesday, July 26, 2011

D2D Christmas in July

For the on going challenge at
I made this card with this weeks Christmas freeby.
Every week you play, you get a free image
in your mailbox.

It is always fun to do Christmas in July challenges
and see what papers and things you have left
from last year. This card is made with some
scrap papers from the dollar store,
a small piece of ribbon that just fitted and
some sticky gemstone snowflakes.
The sentiment is by Stampin'Up!
Have a creative day!


Hambo Bug

Here is my contribution for this weeks challenge at
It is to us an image and make a monochromatic card.
The freebie from last week was this bug, so I used it to make
this easel card ( intructions can be found HERE).

I colored the musquito with copic markers
and added glitterglue on the wings.
The background papers are by Stampin Up!
and the centiment is by Create with TLC.
The fly swatter is a picture I found with
searching through Google.

Have a creative day!

Monday, July 25, 2011

Mark your calendar!

Starting Friday July 29
is going to have a wonderful blog hop
with the new Design Team
and what is best of it
there are also 5 wonderful
FREEBIES
for grabs!
So be sure to mark your calendar and
come hopping back on Friday July 29.

Just couldn't resist making a card with this wonderful picture.
It is an easel card.
Instructions for this card can be found HERE


Birthday sentiment Club Scrap
Breathe deeply sentiment Create with TLC

 Hope you all have a creative day, girls!

Sunday, July 24, 2011

Bird Talk

Paulette, from Create with TLC, emailed me these new nice
birdies images in a set called Talk Cheep.
Of course I had to use them for my PSL cards at Club Scrap.
Here are all the cards I made with it so far, for PSL is not over yet!

Supplies:
Papers: different kits from Club Scrap
Stamps: Different kits from Club Scrap
Digital bird image: Create with TLC
Embellishments: brads, ribbon, flower amd sticky pearls.

Have a creative day!


Saturday, July 23, 2011

Techno Stamper sketch 183

Deze schets van de Techno Stamper vond ik dit keer zo leuk,
dat ik er verschillende kaarten mee heb gemaakt.

The sketch challenge of the Techno Stamper was so much
fun this time, that I made several cards!

Paper: Club Scrap
Stamps: digital sentiment by Create with TLC and picture Bonibleaux Designs
Background with Cuttlebug

Papers: Club Scrap
Letters with Cricut

Papers: Club Scrap
Letters with Cricut

Stamping tip!
You might have noticed that I am not using all of the
Club Scrap stamp (Just want to say Hi),
so did I cut off part of the stamp?
Oh NO!!! I have a little trick to use
half of my stamp and this trick is called:
MASKING TAPE

(click on the image to see everything larger)
1. get your stamp, ink and masking tape
2. cover the part that you do not want to stamp
3. ink up your stamp
4. take of the masking tape, before you actually stamp
5. stamp!
You can practice on a piece of scrap first.


Have a creative day!