Showing posts with label punch. Show all posts

Sunday, February 10, 2019

The Daily Marker day 10

Already day 10! How time flies.
Here my card for 


I was inspired for this card by a sketch challenge


The lion is a rubber stamp by
Stampin'Up! from a set called
A little Wild.
The coloring of the image is done with
 Stampin'Blends.

For the background I used a posteroid die
and a grass border die.

The sentiment is a stamp by Tim Holtz.
And look I got out one of the old paper punches!
Perfect for the dots in the corners.

And a little decoration on the inside.
My grndson is a HUGE lion lover!

Thanks for looking
and have a creative day!


Saturday, June 30, 2018

Twin Birthday

Can you belive it?! The twins turn 3 today!
We spend wonderful hours twinsitting and having
fun with these two boys. We cannot believe how time flies.
We LOVE Colin and Aiden and wish them 
happy hapy happy birthday!!
These are the cards I made for them,
fun little monsters.

For the monsters I used the owl punch by 
Stampin'Up! and the number 3 is a thinlit
also by Stampin'Up!.

The sentiment is a digital one by Create with TLC.

Now I am of to the party!

Thanks for looking
and have a creative day!


Saturday, July 29, 2017

Michael Strong Black & White Blog Hop

Welcome to our
I hope you have arrived here from
Michael Strong's blog and seen what new stamp
is ahead and his beautiful card. Don't forget
to leave a comment for you might win the new stamp!

For my first card I used Michael Strong's coffee cup
stamp and a panda die by Marianne Design.
I made the sentiment up with the computer.
I have it here for you as a freebie.

Just click on the image and save it to your computer.
I used the sentiment on another card:
For this card I  stamped Michael Strong's
Lily background stamp in black.
The bee is a stamp from another set called 
The sentiment is printed and cut out with a shaped die
and a matching larger one for the black paper. 
The bee was stamped on last.
The 3rd card for this hop is made with
the Cloisonné Accents stamps.
They are stamped and embossed with 
black embossing powder. Next they are
punched out with a 1 inch punch.
The butterfly is also a punch.
The birthday sentiment is from the Words set
and embossed with white embossing
powder. On each side of the sentiment
there is a little sticky pearl.

Now there is a lot more inspiration for you
and please move on to the next hop
see whgat a beautiful card she made.

If you happen to loose your way during the hop,
you can always come back here and see the
complete list of participants:
Hetty Sanders -> you are here

Thanks very much for looking
and have a creative day!

Sunday, January 15, 2017

Baby cards

There is a babyboom around me
and I am in need of a lot of babycards.
Today I  started making a few after I noticed
this cute little mouse on the 
Thank you Mary Ellen for all the wonderful
images on your blog.
For my card besides the little mouse,
I used:
a digital sentiment from Create with TLC
banner stamps and punch from 
Stampin'Up! from the set Itty bitty Baby
ribbon and woodsie from stash
the background is a design paper from 
a 6x6 baby block from my stash

For the girl version I used:
a sentiment from Stampin'Up!
from the set Made with Love
a cute ribbon with tiny feet from my stash
a cute tiny wooden peg with a teat
and also a background is a design paper from 
a 6x6 baby block from my stash

Thanks very much for looking
and have a creative day!

Monday, November 28, 2016

Merry Mice for Hanukkah

Today I have been playing with a recent Stampin'Up! set
called Merry Mice. It is a set for Christmas and I have some 
fun cards made with it over at my other blog: 
This time I used the mice to make a Hanukkah card.

I added some Jewish elements to the mice. The candleholder
(Chanukkiah) is from the set Special Occasions and the
dreidl is made with a paper punch.
The mice are colored with pencil.

In the background I used the confetti textured impression
embossing folder (140592) and added 
mint macaron stamping ink.

The inside of the card is stamped with the chanukkiah stamp
again and the sentiment is from Create with TLC.

Thanks for looking
and have a creative day!


Saturday, September 24, 2016

Coffee Lovers Blog Hop day 2

On Saturday I always make something with a Michael Strong
stamp. I am so happy Mike also has made coffee stamps!
You find them here.
Now I play on with the fox theme too.

So this is what I did:
Starting out with plain white cardstock
and printed the sentiments, leaving a gap for
the stamping.The top sentence I just typed up,
but the bottom sentiments are by
So then icut the sheet in two and have two cards in the making.
I watergolored the background with bundled sage distress ink.
Stamped the large coffee cup on green with versamark and
embossed it with copper embossing powder. The fox
is made with the Stampin'Up! foxy friend punch.
Now to make the flowers, I came up with a fun idea using
my used nespresso capsules. I cut the top of and trew away the coffee
and am left with the metal capsule. How great they come in 
wonderful colors!
So I took out a flower punch and punched some
flowers out of the metal, which is quite soft and easy to punch.

With this punch comes a kind of embossing punch. Here you lay the
punched out flower and press the sides together and it becomes a wonderful 3d flower.

I have them already for quite some time and no idea if you can still get
this floral & emboss punch set.

Here another view of the flowers.

For the other card, I used the smaller size cups.
You also see some stamping on the background. This is from the 
Stampin'Up! set Foxy friends.

In the background I used the sequins I won in the last blog hop.
I love them!

Hope you all have enjoyed my post for the 
Coffee Lovers Blog Hop today. You find more 
information about the hop here and how to play along.

Thank you for looking
and enjoy your cup of coffee/tea.


Thursday, July 28, 2016

Art Neko screen devider card

Here I am with another creation for the 
Art Neko design team.
Today I created one of these cute 
screen devider cards. I have seen these around, but
never actually created one myself.
Have you?

Well, here are the measurements if you want to make
one too. You need a piece of cardstock of 11 x 5,5 inch
and a scrore tool. You score at 
2 3/4 - 5 1/5 - 8 1/4
and fold the card harmonica wise.

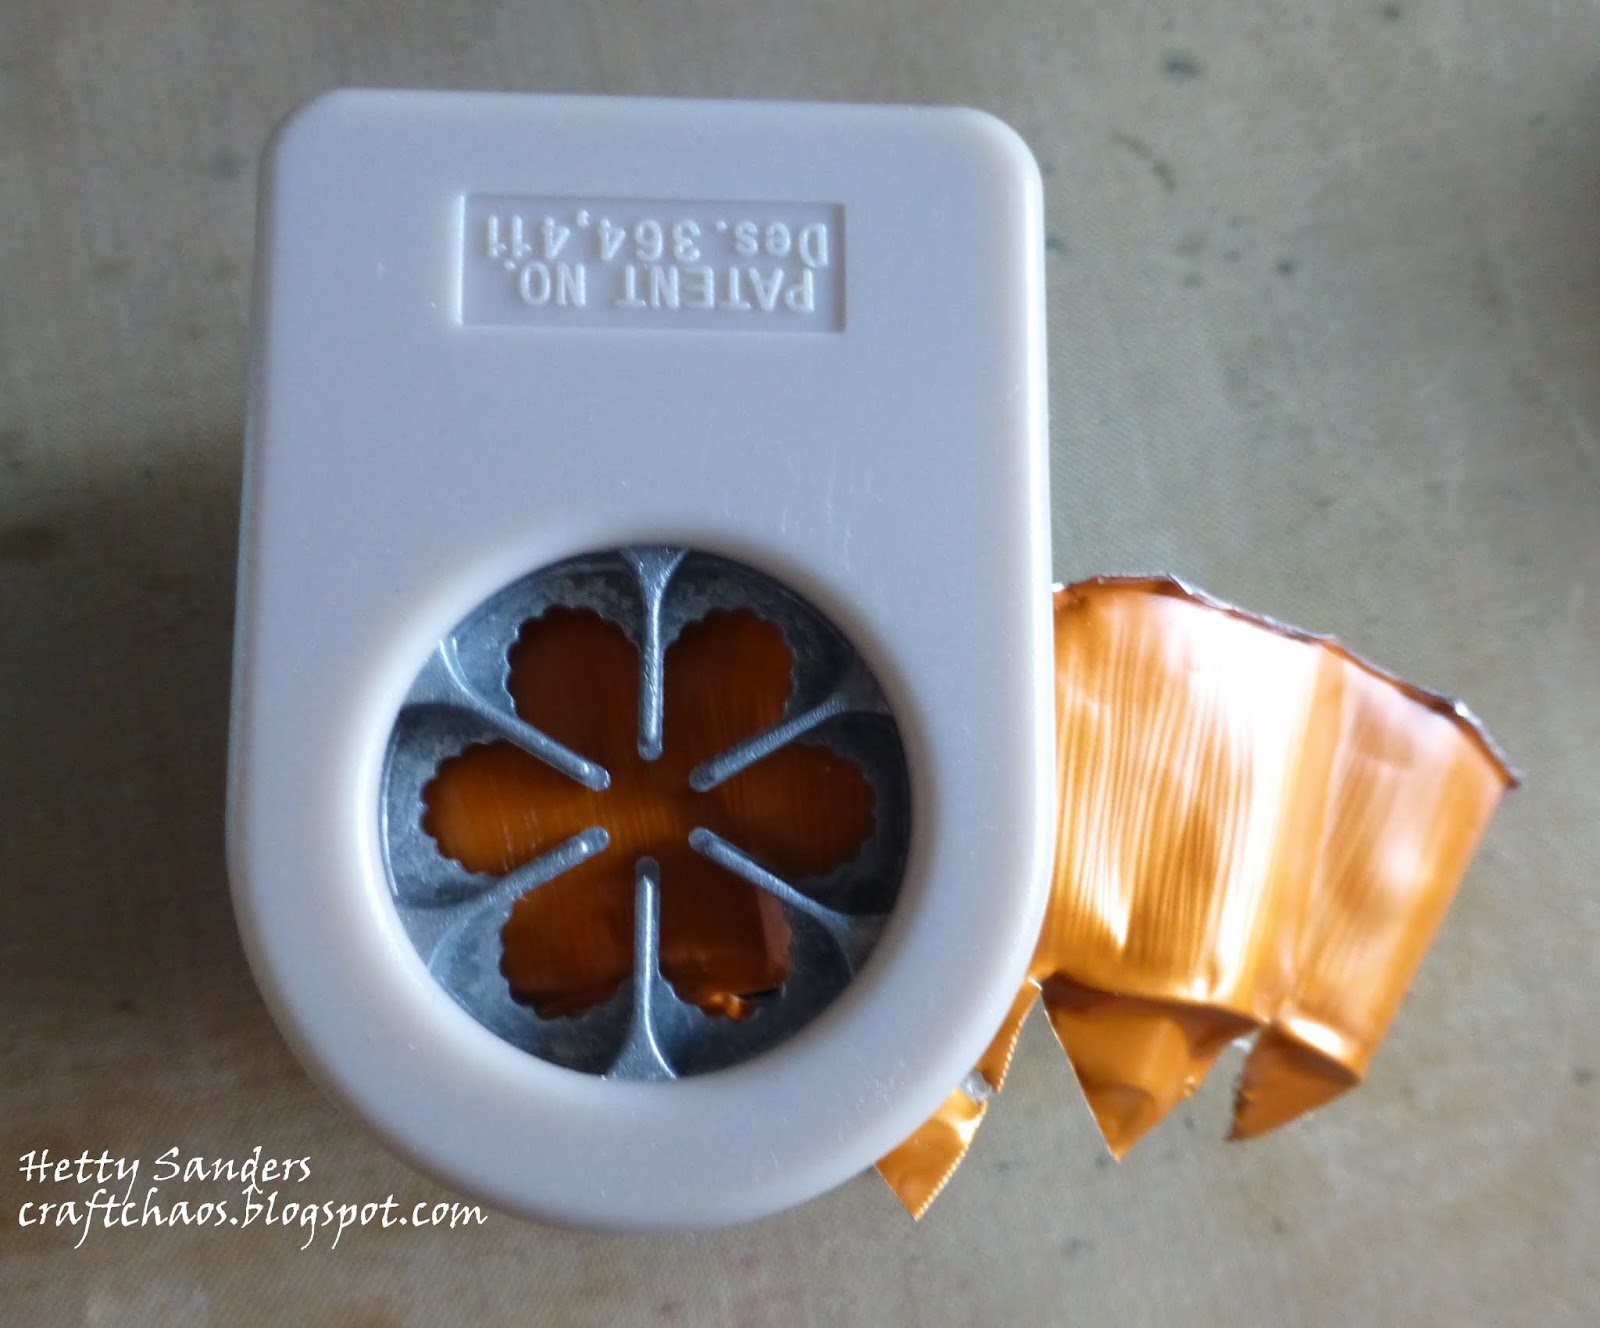
For the bottom of the sceen I used this decorative 
label punch by Stampin'up!. I notice some people
also use a decorative punch at the top,
but I like it to keep straight this time.

For the pannets you cut this:
4x 2 1/8 x 3 3/4 inch black
4x 2 3/8 x 4 inch ivory (matt and stamping)

I created these black pannels, like a screen.
Once you have made one, you can use this as a template
for the other 3 pannels.

Before you add the black pannels on top of
the ivory paper, I stamped it first.
I covered all for sides with post-it notes
so the outside stayed unstamped (you could also
use strips of washi tape).

I used the following stamps:

The Birds on a Blossom Branch stamp:
and the blossom flower

When the stamping is finished you add the 
black screen pannels.

The cats are stamped on ivory paper again
and colored with a water brush getting ink of my craft
 sheet. I used the same color as I stamped them with.


With 3d tape I added the cats to the screen.
I am not sure if I want a sentiment up front, 
so I leave that for when I send it.

Thank you for looking
and have a creative day!


Thursday, May 26, 2016

Tim Holtz 12 tags May 2016:Crazy Cat

Here is my version of the tag for the
12 tags of 2016
for May.

If you want to see all the techniques
that were used please go to Tim's blog here.

For this month I wanted to use my crazy cat stamp
and it worked out perfectly for this tag. I even found
a little ribbon in my stash with cat paws.

The butterfly is cut out of metaland stamped
with it's matching stamp.

To make the tag more dimentional I used the rosette
die,for i do not have the tattered rose.
The labelis stamped with a sentiment from 
an old SU! set with the same name.

The flowers are punched out of  decorated kraft paper
and fastened with a brad. This was a fun tag to create.

Thank you for looking.

Have a creative day!