Showing posts with label digitale stempels. Show all posts

Tuesday, November 17, 2015

Santa and his coffee

Good Morning!
Even Santa needs a coffee to keep his wits!
Here is a wonderful new image by
In Monika Reeck's Etsy shop you find some wonderful
coffee images for only a few dollars. The images are drawn
by her Indonisian friend HN and he can use some support.
Please take a look and see if you can
support himby buying a digital stamp.
Have you never used digital stamps?
Well HERE you find some more explanation what to
do with these digital images.
You find it in the Etsy Shop HERE.
On all these cards I colored the images with 
color pencils and also on all my cards I used
sentiments by Create with TLC. The best thing about
digital stamps is,that you can print themin any size
you would like to use for your card.

The background of this card is a piece of paper from
a Christmas paper block. The circle in the middle is
cut out with a die as well as the sentiment.
Here also a piece of design paper for the background.
Little red gemstone for extra bling on this card.
This Santa needed a bigger cup for his coffee.
This cup is by Michael Strong. No design paper
in the background,but some stamping with a coffee ring stamp
and some beans. 
I enter this card for the  Digital Galore Blog challenge.

For more inspiration visitmy friend

and my other friend

Thank you for looking
and your wonderful comments.

Have a creative day!


Wednesday, September 9, 2015

Rosh Hashanah cards

More cards for the Jewish New Year.
You find info about the Jewish New Year HERE.

As you know I am good friends with Michael Strong
and he planned to make a "Fruit"-set this year,
but it did not happen. I was sad for I had hoped
for an apple that I could use for my cards.

Now look what has happened:
Mike made a digital stamp for me
and all of you to use. You can find the image here:

 Just click on the image and save it to your computer.
There are many ways you can use the image.
If you are good with digital programs, you can 
color the image digital and add a sentiment and
print your card for sending.

As you know I am more of the paper type, so I want to
share with you how I made my cards.

First I printed a few apples on cardstock.
I dud some different sizes.
Then on put some colorson my craft sheet and 
add water with a spray bottle.

Taking a piece of paper and put it on
the craftsheet to add color to it.

This is how the paper look when taking of the
craft sheet. Now I let it dry (you can also use your heat gun).

While the background is drying, I color the apple
with the same colors as the ink,but using distres marker.
Adding the squeezed lemonade for the core
of the apple.

After coloring i spray a little water on the ink
to get the distress effect. Dry with heatgun.

Cut the apple with scissors. Oops,now we have no leave!
What to do?
Doing the same direct to paper technique with 
a piece of scrap with cracked pistachio distress ink.

Take a leave punch (or die) and cut some leaves.
Add some extra ink around the leave.

I added the apples with foamtape to the card.
The sentiment is by Zum Gali Gali
and the Hebrew means Happy New Year.

The sentiment on this card is alsoby Zum Gali Gali.
The bees are from Michael Strongs Hannah's BusyBee set.
On the wings I added someglossy accent.
Here you see a larger apple.I cut thi one to size for the card
and then did the diirect to paper technique.
When dried the apple was also colored with the distress
markers. The sentiment was stamped with the  red and
green distress ink.

Hope this gives you some ideas as what to do
with a digital image.
Have a creative day!


Sunday, January 11, 2015

Sunday Scrap page: new telephone

Even though the new year has started an I have
to make a new book, I want to finish last year first.
Just 4 more to go and 2014 is finished.

This page is from last October when DH and I finally
decided what new telephones we want....yes this took
quite some time deciding and many trips to the
shop and asking questions. But we did it!!

While we were busy installing our telephones I made these
pictures and had an idea for a page,but at the time did
not make it. So now with the Club Scrap Reunion kit
(our clothes match up perfectly!) I finally get it done.

For this large sentiment I used an image
by Create with TLC.It is printed on
the Club Scrap paper and cut out
with a circle spellbinder die.

This set is called "Dial a Saying"set
and you can find it here.
 It is only $ 2,75

Journaling with the computer and printer
and the fun circles are from

The ribbon flowers came with the Club Scrap kit.
The make a wonderful embellishment on the page.
The red circles are punched out of the Club Scrap
paper that is with the embellishment package.

Thank you for looking, 
your comment is much appreciated.


Have a creative day!


Monday, November 10, 2014

Sunday, April 13, 2014

Passover greetings


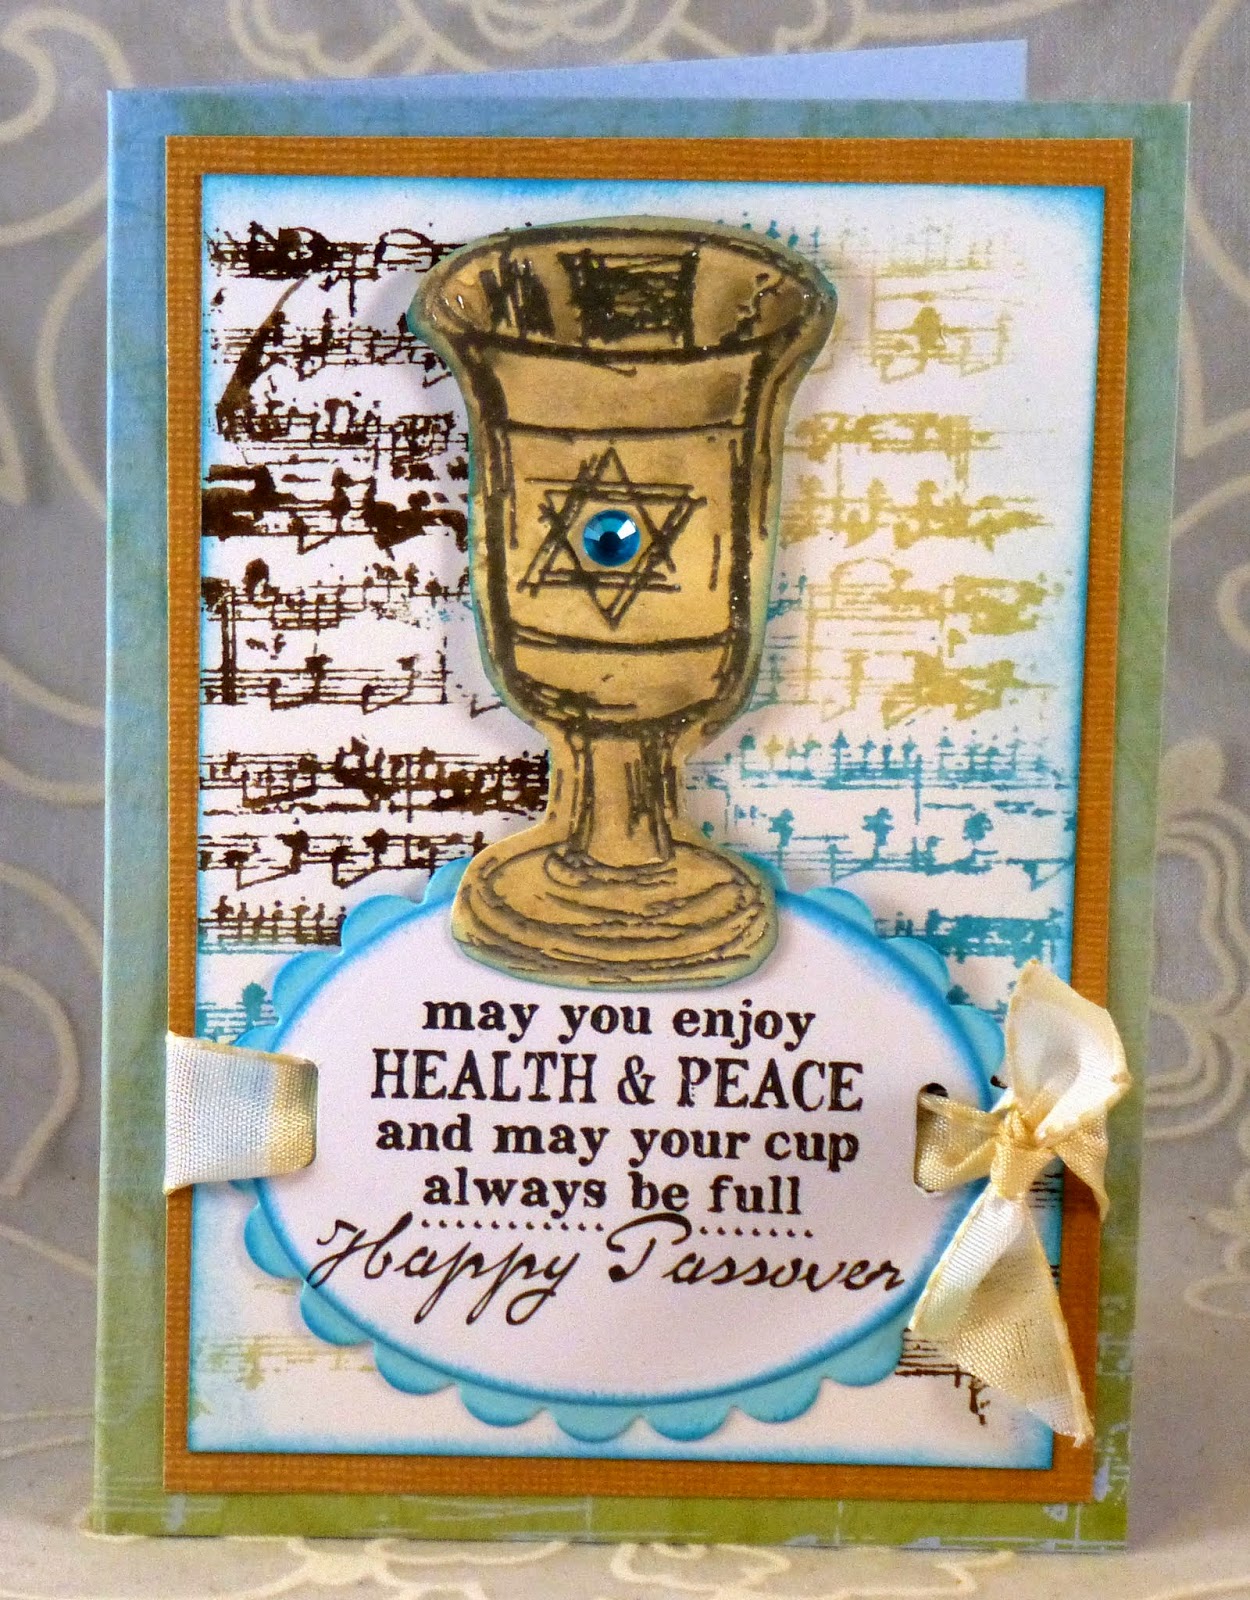
Today I have been playing with a new digital set by 
It is a set for Passover and if you need 
some quick cards.
I just love the subway art with all kind of
words that can be linked to Passover.
With some strips of matzo paper and some pealy accents
a card is quickly made on a large stamped background.

The wine cup on this card is by 
Ruthsjewishstamps.com and can be found HERE.

The cup is first embossed with silver embossing powder
and colored with acrylic distress paint
with the direct to paper technique.
In the middle of the cup I added a sticky gemstone.

Thanks for looking and 
I hope you

Have a creative day!


Monday, February 3, 2014

Create with TLC New digital images

Today I share with you cards that i made with two new
digital sets by Create with TLC.
This is the first set is called "Confidence is sexy"
and you find it here.

The image is printed on kraft paper and colored 
with soft pencils then cut out with a spellbinder shape.
A bunched border (looking like lace underwear)
and a few flowers complete this card.

The second set "Friends who know too much"
can be found here.
For this card I created a window on the front
side of the card. Before I added the colored
paper I punched out a border, to make the
window like a café.

When you look inside the card, you see there is
more to the sentiment, then when you see it from
the front (closed).

I printed the image and colored again with pencil.
 I like the soft colors you get when coloring with pencil.
Then the image was placed in an embossingfolder
and embossed. With a blending tool and distress ink
the background is colored.


The cupcakes are made with a cupcake punch by 
Stampin'Up! I used brown dotted paper
and the backside was white, so both sides 
of the paper were used to make the cupcakes.

On topof each cupcake is a sticky gemstone
pretending to be a cherry.

Thanks for looking
and I hope you are inspired
to try one of these sets.

Have a creative day!


Wednesday, July 3, 2013

4th of July inspiration 4

After seeing the freebie on Create with TLC
I just had to make this tag.
You find the free image here:

Here is how I made this tag:
Start with a white tag and
distress stains in red and blue.
Now we do a technique called Bingo Blast by
 Apr/May 2009
What you do is you sort of throw the
top of the bottle on the tag to make the splash.
Cover all of the tag with red and blue
splashes.

Here a close up.
Click on the picture for an even closer look.

In combination with the splashes
I stamp a little star all over in black
archival ink

and the word happy  to make a background.

See the close up.

With red and blue distress ink
the border is colored.

Here the finished background.
One side blue and one side red ink.

For the ribbon first you stamp the star
in black archival. Then use the red and blue
ink with leaving some white in between.
Dry with heatgun.

The ribbon on the tag.

I cut out a red and a blue star
with my spellbinders, printed the 
and colored this with distress markers.

Behind the larger red star, I put some red white and
blue organza ribbons with a piece of tape.

Here the finished colored image and
the stars behind it.


Have a creative day!