Showing posts with label paper punch. Show all posts

Thursday, February 15, 2024

Caffeinated Christmas Card Challenge: Febuary 2

Hello Caffeinated Creative  Friends!


For my second inspirational card for the
Febuary challange on the
I wanted to use these cute gingerbread dolls.


This paper punch is by Stampin'Up!


I used this Jillibean Soup clear set, that also comes with matching dies.

This is the finished front of the card with the gingerbread men
and a Jillybean Soup Cup stamp (with matching dies).
Ther heart of the cup is also cut out and a peace aff scrap is
pasted at the back of the cup.

And here is the inside of the card, cute too!
Just add your name and send it away.

(sentiment stamps by Stampin'Up!)


Remember the sponsor is:
and her prize is a gift card of $30

The theme is: HEART

and use #cccc26 on Instagram if you post a project.

Thank you for looking and
have a caffeinated crafty day!


Monday, April 5, 2021

Egg Hunt


Hello Crafty Friends!

Have you had a lovely Easter Sunday?
Hunting for eggs? Or for bargains??

I share with you another card made with
which are on sale for 20% until
midnight of April 5th.

For this card I used:
stamp set: Let's Party.

To make the eggs in the jar, I made my own stencil with this egg
paper punch trough a post it note and used the cutouts to cover
eggs if needed.

For the grass border I used the scenic border stencil.
With the inside of the mason jar I covered the pot
as not to get any grass on it.

The bunny from the Let's Party stamp set is stamped
and embossed with black embossing powder and colored
with stamping blend's markers. The punched out eggs
are from some left over Spring Geometric design paper.

Thank you for looking,
stay safe, keep crafting
and enjoy the eggs!


Wednesday, November 11, 2020

Coffee Lovers Blog Hop: Day 6


Hello Coffee Lovers.

Amother delicious day on the 
Today I serve you some tea.

As you know there are many Sponsors to the 
coffee hop and by commenting you can win prizes. 
One of the sponsors is Janesdoodles and I am using her
but I noticed there is also a digital set.


I made these cute gift bags and I show you how to make them.
You need a 6 x 6 inch piece of design paper and best isone
that is decorated on both sides as you can see.
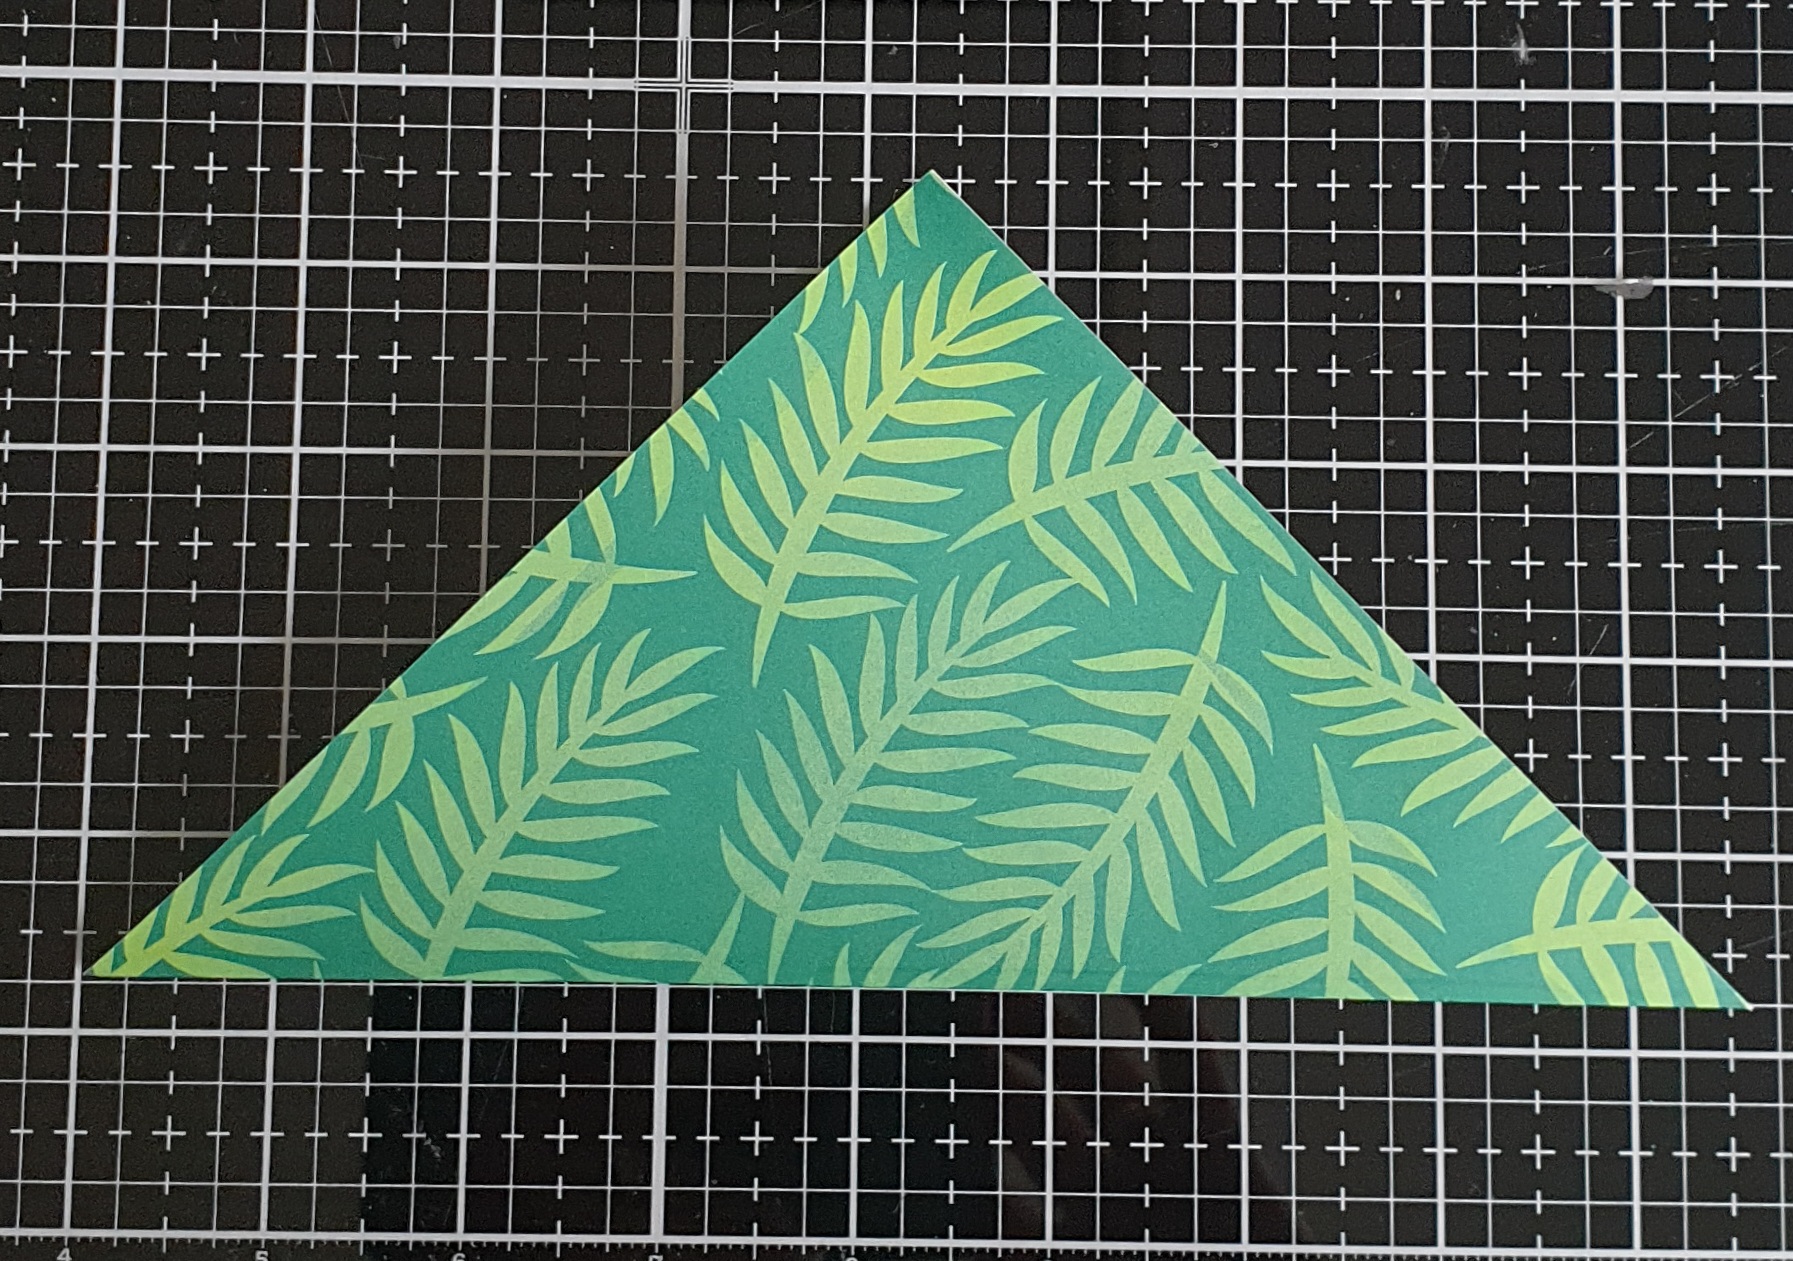
1. You start by folding the 6 x 6 inch of design paper in
half, triangle way. Paper is by Stampin´Up!.

2. Fold onlu the front paper towards the fold line
with tip of the paper.

3. Lift that just folded piece up again and take the right dide
of the triangle and fold it towards the  horizontal folded line
 in the middle of the triangle.

4. Do the same with the left side of the triangle.
Fold it towards the horizontal line.

5. Fold the top flap back down over the other
folded flaps. This keeps the pocket in place and
you do not need any adhesive.

It really started with this gift pouch. It is made with decoration
I liked so much, and wanted to use in some project.
So I cut out all the decoration of the box for my
gift pouch. The sentiment is a stamp from the Janedoodles 
stamp set.

Here you see more of the stamps as decoration of the 
gift puch. The images are colored with zig markers.

Decorations here are made with a few punches I have for
leaves and flowers. The heart of the flower is a sticky pearl.

Stacking 2 cups for  there are two tea bags inside each pouch.

Thank you for looking,
stay safe, enjoy your coffee
and keep crafting!


Sunday, September 6, 2020

Grid card tutorial


Hello Craft Friends,

I hope you have enjoyed my previous grid cards.
I got some questions on how this card came about,
so here is a tutorial:
What do you need:
cardstock for your card base
design paper
and the grid printed out (you find it HERE)
a square paper punch
(mine is 6/8 inch or 1,7 cm)

glue
scissors
double sided tape
foame tape

About the paper punch: see what you have
and you can ajust the grid to the punch you have.
I printed out several grids, to find the right size
for mypunch.

Punch out 18 squares to fill the grid.


Use glue to add the squares to the grid.
For the border you have to cut the squares diagonal 
before adding them to the grid.


Next I used Michael Strong's large dragonfly stamp.

I stamped with versamark and then I embossed the image with white embossing powder. Then I cut out the dragonfly. For decoration I used a few sticky gemstones.

Assemble all the layers and leave the wings to fly free.


If you do not like to make square cards, you can cut the grid to a rectangular size.

Here the result of a rectangular card.
The 4 corners are a little smaller than half a square,
but after glueing, it is easily cut of.

For decoration I used Michael Strong's mini
dragonfly stamp. I also embossed these.

Here the finished card with the dragonflies with
their wings free from the card. I decorated all the 
dragonflies with one dark purple sticky pearl.

Hope you got some inspiration for
 some cards of your own design.

Thank you for looking,
stay safe and
keep crafting!


Saturday, August 22, 2020

Cupcake Birthday Celebration #500


Good Morning Crafty Friends!

Today I made a card for the
It is one of the blogs I really like their challenges.

The picture is the inspïrationm or sometimes
it is a color inspiration, always fun with cupcakes.
Here is my birthday card for them.

I made one of the hot slim cards (8.25 x 4 inch) with rainbow
colored cupcakes.
Here you see some of the stuff  used to make the card: 
inks, stencils, paper punch and crumpler (for the base of the cupcake).

I used the following stencils by Funky Fossil Designs:


The sentiment is digital by Create with TLC.

For the cupcakes I used 7 colors of paper and punched them 
all out (hooray for scraps!) A little brown ink around all
the pieces makes it more lively. They are all attached
to the card with foam tape and finished of with white 
sprinkles on the cakes.

Thank you for looking,
stay safe and
keep crafting.


Friday, August 21, 2020

Bugaboo Freebie: Moon Girl


Good Morning Crafty friends!

Your weekend is about to begin soon and how about
a FREEBIE to play with?!
You find this Moon Girl on the

It is a kind of Halloween image, but I am not ready for that
with the hot temperatures outside, so I used her for a love card.

A black and white plaid background paper and a little coloring
for this card made it also a quick card. The circle sentiment
goes wonderful with the moon image and a few punched out
stars finished the card.

Thank you so much for looking,
stay safe and
keep crafting.


Tuesday, June 16, 2020

Tuesday Morning Sketches #559


This week it is my turn again to share a card I made

I started out with the design paper (SU!) and the ribbon
and only a sentiment had to be added, 
but I found that too boring.

Than I came across the bird cage between my scraps
and just had to add it to the card as a more interesting 
focal pont for the card. The bird cage is a die by Tim Holtz.

The birds are punched out (an oldie by SU!)  and
decorated with a few silver gemstones.

The sentiment is a rubber stamp by Tim Holtz
from the Glorious Bouquet Set CMS 325.

Thank you for looking,
stay safe and
keep crafting!


Monday, June 15, 2020

Anything but a Card: Gift Box


Happy Monday!

Anything but a Card is the challenge on the
Catch the Bug Callenge Blog.

Today I have a little gift box for you and
of course we start the week with
 a wonderful cup of coffee.

I was inspired by a tutorial I found 
The tutorial of the gift box was found HERE.

Only this box was for large tealight candles.
The ones I have here (in The Netherlands) did not fit.
So I had to addapt anyway.
Then i got the idea for the coffee box.
Now I used a base of 7 x 7,5 inch cardstock
and the scrore lines are the same.

Fotr the inage I used
Stella is colored with Stampin'Blends.

The ribbon is behind the  sentiment
(see the tutorial video how it is created).

Inside the box two instant coffee sticks.

Thank you for looking.
Stay safe
and keep crafting!