Showing posts with label chanoeka. Show all posts

Sunday, December 6, 2015

Happy Hanukkah


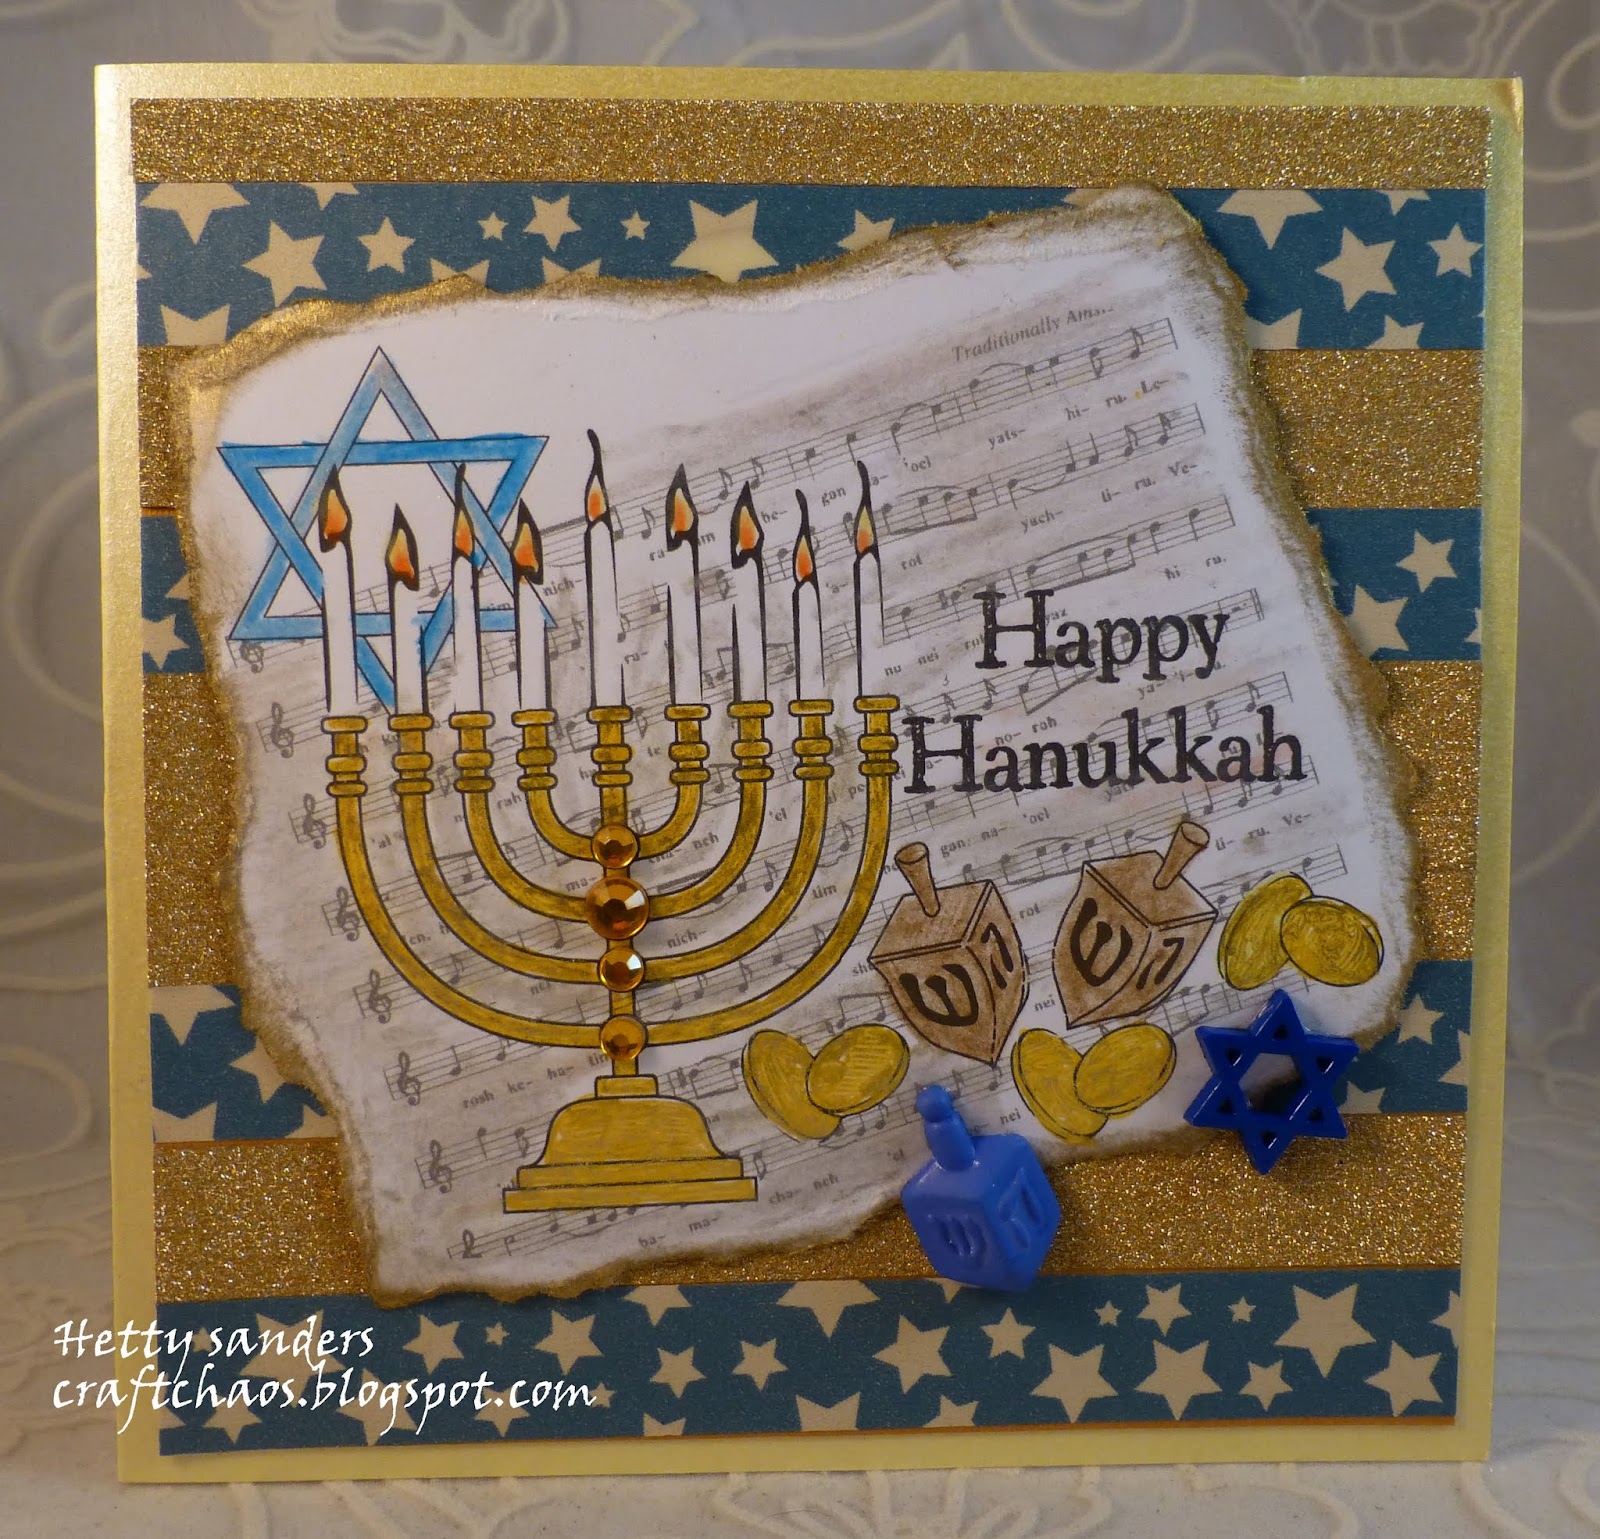
Happy Hanukkah to all my Jewish friends!
May your lights shine bright
and wishing you all a wonderful week of
making latkes, singing songs and celebrate.

Today my card is full of dreidels that I constructed with
Michael Strong's mini pot stamp
and used digital images from Create with TLC.

A dreidel is a little toy top. In Hebrew
it is called a "sevivon" and I found this cute
video of the Muppets singing this song.
I thought this was real nice to share with my grandson.
Now I will teach him the song.

How did I make this card?
For the background I used Tim Holtz musical tussue
paper. I glued it to a piece of cardstock and painted it
with silver distress ink. When dry, I used the star embossingfolder
and added a little blue in on the stars.

Here you see the dreidels. I stamped the pot on light blue paper 
with versamark and embossed the image with silver embossing
powder. Then cut out the 4 little pots. I used turquise paper to
make the dreidels to stick behind the pots. The Hebrew letters
on top are also embossed with silver and cut out with a 
circle punch. These letters have a meaning. They go from right
to left and say in Hebrew: Nes gadol haya sham", meaning
a great miracle happened there (there being in Israel).

These letters are also used for the game played.
Each player has some gelt (coins,realor chocolate).
You spin the top and when it falls down you see a letter
on top. These letters tell you what to do.
a) Nun means “nisht” or “nothing.” The player does nothing.
b) Gimmel  means “gantz” or “everything.” The player gets everything in the pot.
c) Hey means “halb” or “half.” The player gets half of the pot. (If there is an odd number of pieces in the pot, the player takes half of the total plus one).
d) Shin (outside of Israel) means “shtel” or “put in.” Peh (in Israel) also means “put in.” The player adds a game piece to the pot.

This is the set of digital images I used from
Create with TLC for this card.

Here the inside of the card.

Thank you for looking,
I am going to light the first candle tonight.

Have a creative day!


Thursday, December 3, 2015

Hanukkah 3

At Create with TLC there are so many fun images,
I cannot stop playing.
You find all the images HERE.

For this first card I use the sentiment,that I had printed
before, but now for a totally different card.
I go vintage style this time.

The candles I made with my quickuts. Rememberthe time 
before all the dies and the bigshot?!! I have this fun set
with dreidel, david star and candles with candle holder.
On top of the candles I glued a metal flame.The 8 is a
metal number out of a Tim Holtz number package.
I embossed it with copper to fit the style of the card.

Why the *8"? It is because Hanukkah last for 8 days.
A bit of left over background paper also decorated the
inside of my card with dreidles cut out also with the quickutz.

You may wonder: what are those dreidels used for?
This little toy is used for a game and each side has a 
Hebrew letter and means something. If you are
intrigued, you can read all about it HERE.
The 2nd card also has this vintage style
and a bit more gold on the background.I have
lotof these block of design paper and I try to
use them,fori promised myself not to buy more.

Now for the candles on the image Iused an embossing
pen en embossed the candles with white embossing powder.
This gives it a real candle-like look. The flames have been
colored with pencil.

These dreidels are also images from Create with TLC
and colored with penciland taped to these tickets with
foam tape. These tickets are a die fromTim Holtz.
A little rubber stamping on the background to give the
ticket more depth.
Also here inside the card a little left over paper
from the front for decorating the inside of the card.

Thank you for looking.
Have a creative day!


Wednesday, December 2, 2015

Hanukkah 2

Welcome to more Hannukah inspiration.
Hanukkah is this yea from Sunday eve December 6
until Monday 14th December.
If you are wondering what This Jewish Holiday is all
about, do take a look HERE and you will also find
some recipes!

My first card is with images from Create with TLC
and for the color challenge of the Cupcake Inspiration Blog.
Last week I  was one of the of the Sweet Six,so
I want to thank the sesign team of the Cupcake inspiration for this.


I started with printing the Hanukkah images by Create with TLC.
You can find them HERE.  I colored the image with a golden
gelly roll pen and pencils. The sticky gemstones give the candle
holder even more bling. If you click on the photo,you see a larger version
and this way you see better the embossed background with little stars.

Here another card with an image by Create with TLC. 
It is a collage image,just a little color and it is perfect
to use on any matching background.
You also find the image HERE.
The background of this card is made with washi tape:
the blue starry one and a golden tape.

The picture is also colored with a golden gelly rollpen
and pencils. Also I added some plastic embellishments
to keep the card light for sending.
Dreidels

Have a creative day!

Tuesday, December 1, 2015

Hannukah 1

Yes, Hannukah, the Jewish Light Holiday is 
around the corner and I am making a few cards.

This is the first one. I just couldn't help staring
with my coffee addiction!

The image is by Create with TLC and comes in black.
For this card I change the color in a coffee brown and
printed it on a heavy white paper.

Next I took Michael Strong's mini coffee cup and
embossed it with copper embossing powder on 
blue paper. Then cut it out and used a piece of
foam tape to tape it over the "a" of happy.

The background is a gold panel and I used the 
sizzix coffee bean embossing folder.

The ribbon is from www.dianamlarson.com.
She has some beautiful hand died ribbons.
Of course I now have some of the coffee colored ones!

Thank you for looking
and there will be more tomorrow!


Wednesday, November 27, 2013

Club Scrap Blog Hop: Fire&Ice for Hanukkah

Here we are with our monthly
Club Scrap Blog Hop.
for the Fire & Ice kit:

For all participants you can always look
but you just might have come here
after seeing Tricia's wonderful project.

At the Club Scrap Retreat the
envelope punch board waiting for me
to take home,so I just have to share something
with this wonderful tool with you.
Not only it makes great envelopes in any size you wish,
it also creates wonderful tabs for file folders
and this is what I have come up with for my scrap book
page, that I want to share with you today.
No pictures? Yes,sorry, they have to be made 
for tonight the Jewish Holiday of Hanukkah
starts with lighting the first candle. I will share
these pages again for sure with pictures!

But in my file folder I have already some Hanukkah recipes
(you can also use this for hidden journaling or
adding some extra pictures)
 and here is how it is made:

Start with a piece of cardstock 5,5 x 9,5 inch
(click on the picture for larger image)
On this template you see were to score the lines for folding
and which part you will cut away (green lines).

After you have prepared your cardstock like this you
will make the tab on the top with your envelope punch board:
Put the cardstock inside the punch on the left side 
for your firt cut.
 
Move your paper towards the left ( I stoped at 2 1/4)
and punched again. Now it looks like this.
Take a ruler and craft knife to cut away the right side
 of the paper (sorry for having my ruler upside down,
but there is no measuring involved).

Use the oter side of the punch to round the right
side of the file folder. 
Use small tape to stick the flaps to the back of the file
folder. This backside will be attached to your scrapbook lay out.

Then I cut some loose papers to go as recipe cards
inside the file folder.You can also use it for extra
pictures. The top of these cards is done in the
same way as the top of the file folder.
For decoration of the file folder and the rest of my pages
I used the old Hanukkah stamps from 2006 by Club Scrap.
Here a more close look at the left page with 
the file folder and I just had to add an envelope too!
They are so easy to make in any size. 

This is the right part of the lay out.
I have some images in my head that I want to shoot,
hopefully it all works out.

Finished file folder with text and punched out
stars of david.

The recipe's! Click on the picture
for a larger view.

Thanks for stopping by to look at my project,
but there is more,
yes more on the next blog.

Go and see what my friend
Kay has to show you this time.


Have a creative day!


Tuesday, December 4, 2012

TH December tag 2

Here is my entry for the last two tags for 2012.
This challenge on the blog of Tim Holtz was
a lot of fun this year. I do hope Tim comes up
with another wonderful challenge for 2013.
These are my finished cards together.
As I do not celebrate Christmas, but Hanukkah
(secretly still hoping Tim will do some candles one day)
I made one card for Hanukkah and the other one
is for my sweetheart.
I only bought the small snowman, so this is
what i came up with using Tim's techniques.
The snowflakes are dies and I cut them out
of watercolorpaper (left over from the
snowmen) and colored them with distress stains.
In the heart each snowflake has a sticky gemstone.
Here my Hanukkah card.
Hanukkah starts on the 8th of December this year
and lasts for 8 days: each day we light a candle more.
He you might say: I see 9 candles! Yes, well one is the helper,
he is the one that lights all the candles every day.
More info about Hanukkah can be found HERE.

On the tag you see an image from
Create with TLC. The candles are colored white
with a picket fence distress marker.
The flames are colored with mustered seed and marigold
finished with a little drop of rock candy stickles.

 
On top of the big flower you see a dreidel and gelt.
This is a game we play during the festival of hanukkah.
Flower and dreidel are covered with rock candy stickles.
This image is also by Create with TLC.
 
Thank you Tim for a wonderful year
of inspiration!
 
 
Have a creative day!