Friday, July 31, 2009

New project of Club Scrap

Maak je eigen pen met dit project van Club Scrap. Of had je hem nog liggen en wist je niet hoe het moest?
Hier is het nieuwste filmpje van Tricia Morris met een duidelijke uitleg. Het is een geweldig cadeaux voor jezelf of voor een speciale gelegenheid voor een ander.


Milestones Pen Club Stamp Project from Club Scrap on Vimeo.

Here is a wonderful project by Club Scrap: a pen. You can make it for yourself or give it as a present for a special occasion. Did you get the project and did not know how to go about it? Well here is Tricia Morris with an easy explanation on how to go about it.

Roos met mini hartjes/ Rose and mini heart

Nog een rozen kaart. Het is echt makkelijk om te doen en het resultaat is prachtig. Papier van deze kaart is allemaal van Club Scrap (Memoirs) en de hartjes zijn de nieuwe mini-hartjes van Michael Strong. Het idee van de roos komt van Valita's blog.
Another rose card. It is fairly easy to make these roses and you have a perfect result. Papers for this card are by Club Scrap (Memoirs) and the hearts are the new mini hearts by Michael Strong. The sentiment stamp is also by Club Scrap. The idea of the rose is on Valita's blog.

Thursday, July 30, 2009

Rozen/ Roses

Geinspireerd door Valita's blog heb ik deze kaarten met rozen gemaakt. Wil je het ook eens proberen? Neem dan hier heen kijkje: http://valitasfreshfolds.blogspot.com/2008/08/punched-oval-rose-bud-tutorial.html
Je hebt er verschillende ponsen voor nodig en je cuttlebug. Ik heb deze kaarten met Club Scrap papier gemaakt en de tekst is een um stempel van Club Scrap.Inspired by Valita's blog I made these cards today. Would you like to try it too? Than take a look here: http://valitasfreshfolds.blogspot.com/2008/08/punched-oval-rose-bud-tutorial.html
You need some punches and your cuttlebug. I used Club Scrap papers and sentiment stamp.

Mini-hummingbird

JA, ze zijn zo leuk die nieuwe mini stempels van Michael Strong!!! Ik heb er al een paar kaarten mee laten zien. Vandaag een achtergrond lesje erbij. Je hebt hiervoor nodig:
je cuttlebug, de swirl embossingfolder, papier, inkt, sponsje, clear embossingpoeder, heatgun en schaar.

YES, they are so cute the new mini stamps by Michael Strong!!!. I have made shown you a few cards, but today I have a background tutorial for you. This is what you need:
your cuttlebug, the swirl embossing folder, papers, ink, sponge, clear embossing powder, heatgun and scissors.
Laten we dus met de achtergrond beginnen. Knip hiervoor uit een willekeurig papiertje een wolkje (je kunt de mijne kopieren).

Let's start with the background. Cut from any kind of paper a cloud (you can copy mine).
Neem voor de achtergrond een stukje wit papier en blauwe inkt. Leg het wolkje op je papier en gebruik je sponsje om de vorm van het wolkje op de achtergrond te zien. Beetje oefenen!
Take a piece of white paper as background and a blue inkpad. Put the cloud on your background paper and use a sponge to get the cloudshape on your background. Takes a bit of practice!

Als de achtergrond naar je zin is, neem je je swirl embossing folder en legt je achtergrond er tussen.
When you are satisfied with your background, take your swirl embossingfolder and insert it.

Draai de folder met je B platen door je cuttlebug.
Have your embossing folder sandwiched between your B plates and run it through your cuttlebug.
En zie hier het resultaat.
And this is the result.
Nu gaan we met de stempel aan de gang. Ik heb dezelfde blauwe inkt voor de vogel gebruikt. Stempel nu de vogel twee maal en gebruik hierop clear embossing poeder en dan je heatgun.
Now we are going to use the stamp. I used the same blue ink for the birds. Stamp the bird twice and use the clear embossing poder and your heat gun.


Knip de vogel uit. Als je het leuk vindt om hem op een tweede laag te plakken, snij dan het buikje en de vogel uit.
Cut out the bird. If you like to add another layer of paper cut also the belly and the wing.

Plak de vogels nu op de tweede laag papier.
Glue your birds on de second layer of paper.

Knip de vogel met een randje om de eerste vogel opnieuw uit.
Cut the bird again with some extra rim around the first bird.
Ik heb een klein glinstersteentje op het oogje geplakt. Maak nu de kaart af.
I added a little gemstone on the eye. Finish the card.

Met dank aan Valita voor het idee op haar blog. Neem er zeker een kijkje, want zij heeft nog meer leuke tips.
Thanks Valita for the idea on your blog. Do go and hop over, for she has some more great tips.

Tuesday, July 28, 2009

Club Scrap mozaiek/ Club Scrap Mosaic

Hier is het derde filmpje van Club Scrap in de serie: Wat doe ik met tapijt (plak)band? Deze keer maken we er een mozaiek mee. Nikki heeft weer een prima filmpje met uitleg gemaakt, dus kijken en doen! Onder het filmpje zie je mijn eerste mozaiek. Het is gemaakt met Club Scrap Matrix Papier en verschillende Club Scrap stempels.

Carpet Tape Chronicles: Part Three from Club Scrap on Vimeo.


Here is Club Scrap's third video in the Carpet Tape Chronicles. This time we use it to make a mosaic. Nikki made a perfect video for us to explain how to go about it, so watch the video and start your project. Here you see mine. I used Club Scraps Matrix papers and some different Club Scrap stamps.

Monday, July 27, 2009

Een paar kaarten/ A few cards

Ik heb de laatste paar dagen wat kaarten gemaakt (als je klikt op de foto, kun je ze groter bekijken). Papier van alle kaarten is van Club Scrap. De bloem op de achtergrond en de teksten zijn ook van Club Scrap. Het oudere echtpaar is van I brake for stamps en de dame op het strand is van American Art Stamps. Het frame is van Michael Strong. Here are a few cards I made in the last few days (click on the photo and you can see the bigger version). The papers are all Club Scrap. The background flower stamp and the sentiments are also Club Scrap. The senior couple are from the senior stamps by I brake for stamps and the lady on the beach is by American Art Stamps. The frame is by Michael Strong.

Wednesday, July 22, 2009

Zeemeermin/ Mermaid

Hier nog een kaartje met een spin & splash achtergrond. Ze zijn echt overal leuk voor. Nu met de zeemeermin van Magnolia en de leuke mini-stempels van Michael Strong. Here another card with a spin & splash background. You can use them for everything. Here with a Magnolia mermaid and the wonderful new mini stamps by Michael Strong.

Tuesday, July 21, 2009

Spin & Splash

Ik heb veel vragen gekregen over de spin & splas, vandaar hier een lesje. Allereerst: wat is het? Het is eigenlijk een speelgoed ding voor kinderen. Je koopt het dan ook op de speelgoedafdeling van een winkel (en is niet al te duur).

I got many questions about what is a spin & splash, that is why I made this tutorial. First: what is it? It is a children's toy! You buy it in the toy department and it it not very expensive.
Het mooiste resultaat krijg je met alcohol inkt en glossy papier. Neem 2-3 kleuren inkt en maak het papier op maat van de machine (vierkant). Wil je wat kleiner papier, doe dat een stukje blue tack of dubbelzijdig plakband in het midden om het papier op vast te maken.
The best result is with alcohol ink and glossy paper. Take 2-3 colours an cut the paper in the right size (square). If you want a smaller size add some blue tack in the middle or some double sided tape.
Nu doe je de machine aan (ja hij gaat op batterij) en laat een paar druppels inkt op het papier vallen (gelukkig heb je een spatdeksel). Van elke kleur heb je maar een paar druppels nodig.
Now you put the machine on (yes, it operates on batteries) and let a few drops fall on the paper ( so glad to have this ring around the machine). From each color you only need a few drops.

Laat het even draaien. Zo ziet het er dan uit.
Let it spin for a few seconds. This is how it looks like.
Nu kun je de machine uitzetten en geniet van het resultaat!
Now you can stop the machine and enjoy the result!
In een korte tijd heb je een aantal prachtige achtergronden om kaarten mee te maken.
Ik weet zeker dat je kinderen graag mee zullen doen!
In a short time you will have a few beautiful backgrounds for making cards. I am also sure your kids will love to play along!
Hieronder het resultaat van mijn kaartje. Ik heb hier voor de grote cirkel en de kleine libelle van Michael Strong gebruikt.
Below you see my finished card. I used the big circle and the mini dragonfly by Michael Stron

Nieuwe Stempels/ New Stamps

Jaaaaaa! ze zijn er, de nieuwe mini stempels van Michael Strong. Ze zijn echt zo schattig! Zeer geschikt voor atc's en op tags. Maar natuurlijk ook op kaarten en scrap pagina's. Hier een eerste kaartje. Zo kun je goed het verschil zien tussen de grote en de kleine stempels.
De Achtergrond van deze kaar heb ik met de spin&splash machine gedaan en de tekst is van Club Scrap. YES!!! they have arrived, the new mini stamps by Michael Strong and they are soooooo cute! They are wonderful to use at atc's and tags. But also at cards and scrapbook pages. Here is my first card. I used the shell stamp big and small so you can see the difference. For the background I used the spin&splash machine and the text is by Club Scrap.

Sunday, July 19, 2009

Alcohol Ink

Momenteel volg ik het blog van Jennifer McGuire. Waarom? Zij heeft een negen weken lopende lesjes serie met heel veel stempel technieken. Reuze handig voor nieuwe stempelaars, maar ook voor mensen die weer eens een impuls willen hebben met alle spullen die ze al thuis hebben staan. Van de week heb ik een lesje gekeken over de "kissing technique" met alcohol inkt en heb het toegepast op onderstaande schilderijtje. Alcohol inkt op klas en de vis stempel van Michael Strong. Het was in 10 minuten klaar en een geweldig resultaat. At the moment I follow the blog of Jennifer McGuire. She has a nine week stamping lesson going on and it is great for new stampers, but also a wonderful impuls for those who have all the things at home and need some new ideas. This week I watched a video on "kissing technique" with alcohol ink and I did it on this picture. It was done in 10 minutes and I just love it. I used a piece of glas for framiong pictures and the fish stamp by Michael Strong.

Thursday, July 16, 2009

Shopping bag

Ik krijg zoveel vragen over die leuke tasje op de pagina's bij mijn Retreat album, dat ik hier even laat zien hoe ik het heb gedaan. Die tasjes zijn doorzichtige stickers, en daarop heb ik de tattoos can Club Scrap geplakt en daarna de sticker op papier en uit geknipt. Alles is duidelijk te zien op onderstaande foto's.

I get so many questions about how I did the shopping bags in the Retreat album, I made some pictures to explain this. The bags are clear stickers and on top I added the Club Scrap tattoos. Than I stuck the bag sticker to cardstock and cut it out. I am sure the pictures below will clarify all your questions.


Retreat Album

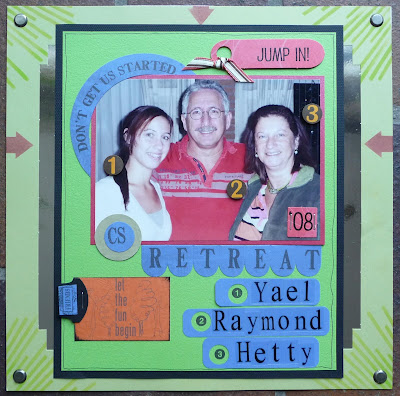
Eindelijk ben ik dan bezig om mijn pagina's af te maken van het Club Scrap Retreat waar ik in september 2008 ben geweest. Ik loop altijd achter. Gelukkig is het weer het Club Scrap zomerkamp en dan moet ik dus wel mee doen om mijn pagina's eens af te maken. Hier zie je de voorkant van het album. Wil je de rest ook zien? Neem dan HIER een kijkje. Ik voeg steeds pagina's toe, dus kom zeker nog eens terug! Finally I am going to finish my Club Scrap September Retreat 2008 album. I am always behind, so I am glad Club Scrap Summer Camp is here! So I do have to make some pages. Here you see the cover of my album. Would you like to see the rest? Please take a look HERE. I will add more pages when done, so please do come back.

Monday, July 13, 2009

Club Scrap Memoirs


De nieuwe pizza doos van Club Scrap is er weer. Hij heet Memoirs en is echt prachtig. Vandaag ben ik er mee aan de gang gegaan en heb gebruik gemaakt van al die leuke nieuwe ideeen van de stempelvideo's van Jennifer McGuire op haar blog. De lesjes heten Thinking Inking en een van die lesjes heb ik gebruik gemaakt voor deze kaarten. De achtergronden zijn gemaakt met metallic dabbers (zilver en koper) en past helemaal in de sfeer van het nieuwe thema. The new pizza box by Club Scrap has arrived and the theme is Memoirs. I couldn't resist using the new papers right away. They are so beautiful. For these cards I used some ideas of the wonderful stamping video lessons by Jennifer McGuire on her blog. The lessons are called Thinking Inking and I used the lesson on dabbers. For the background I used metalic silver and copper and they combine beautiful with the new papers.

Saturday, July 11, 2009

CD boekje/ CD mailer booklet

Dit examen boekje is gemaakt met een kartonnen cd hoesje naar het idee van een filmpje bij Club Scrap. Je kunt het HIER zien en misschien geeft het jou ook een goed idee. Ik heb hiervoor Fizz en Bistro papier van Club Scrap gebruikt en UM stempels speciale graduation uitgave. This graduation booklet is made from a cd mailer. I got the idea from a Club Scrap video. You can see it HERE and maybe you also get some inspiration for a booklet. I used Club Scrap Fizz and Bistro papers and some special UM graduation stamps.

Wednesday, July 8, 2009

Vakantie/ Vacation

Voor deze kaart heb ik de Techno Stamper kaartschets # 77 gebruikt. Alle stempels zijn van Stampin'Up! (veel verschillende sets) alleen de tekst "our vacation" is van Autumn Leaves.
Beschrijving van het koffertje vindt je op mijn knutselblog. For this card I used card sketch #77 on the Techno Stampers blog. All stamps are by Stampin'Up! (lot's of different sets) except for "our vacation" that one is by Autumn Leaves". Template and how to do the suitcase you will find on my craft blog.

Sunday, July 5, 2009

More 4th of July cards

Papers and stamps are all by Club Scrap. I used Herringbone technique and the weaving technique. The picture of the lady I googled on the internet (search: vintage 4th of July).
Hope everyone has a great weekend!

Saturday, July 4, 2009

Happy 4th of July!

Voor al mijn Amerikaanse stempel en scrap vrienden heb ik deze kaart gemaakt. Het papier is van Club Scrap, evenals de stempels op de achtergrond en het woord "freedom"(van een stencil).
De vogel is een stempel van Michael Strong.
This card is for all my American Scrap and Stamping friends, to wish you all a very Happy 4th of July. This card is made with Club Scrap Freedom paper. The background stamp and the word "freedom" (stencil) is also by Club Scrap. The bird is a stamp by Michael Strong.

Wednesday, July 1, 2009

Winner of Club Scrap Stamp


I just got an email by Tricia Morris from Club Scrap to tell me the winner of the Club Scrap stamp is:


Shirley said...
Congratulations on 10 years!!! Here is to 100 more.


So Shirley, please email me and tell me where to send your stamp!!


Congratulations.

Fijne Vakantie / Happy Trails

Met het restje (midden deel) van het frame van Michael Strong heb ik vandaag deze kaart gemaakt voor iedereen die op vakantie gaat. Papier, tekst en gesp zijn van Club Scrap. With the left over from yesterday's card (the middle of the frame stamp by Michael Strong) I made this card for everyone who is going on vacation. Paper, text and buckle stamp are by Club Scrap.