Friday, May 31, 2013

Tim Holtz May tag: smile

On the last day of May
I present you my tag.
Sorry Tim,
but this time the tag did not inspire me :-((
 
Just could not get the
technique to work for me,
so this is the
unfortunate result.
I will keep on trying!

 
For all instructions
visit Tim's blog here:
Looking forward to see what you have for us in June.
 
Have a creative day!


Thursday, May 30, 2013

Michael Strong Technique Thursday

When I was shoping I found
this cute hanger for the home
(Dutch ladies: it is available in Action
and only € 0,99).
 
When i saw this, I knew I had to alter it
with my Michael Strong stamps.
 
This is what you need:
1 house stamp
1 heart stamp
Viva Decor inka gold colors
spray bottle with water
versamark
black/ white embossing powder
paper
heat tool
 
I prepared the paper with Viva Decor inka cold colors.
There are two ways of doing this.
For the first way you take some colors of inka gold
out of the pot and onto your craft sheet.

Spray with water amd mix a little with a brush.

Take your paper direct on the craft sheet
and pick up the paint until you have covered your paper.

This is tghe finished paper.
Leave it to dry.

The other way is the dry way.
Take two pots on color that you want to use.

You can use your finger or a sponge
to color the paer with. Start with the
lightest color.

And then ad the next color.

Cover your complete oiece of paper.

With the dry way you can stamp and
emboss right away on the paper.

For the wet way you have to either dry the paper
with your heat tool or just wait until it is dry.

Here is the finished project.

You see I embossed the house in black
and the heart in white.
 
In the heart of the flowers I glued little gemstones.
There are also red gemstones on the heart.
 
Thanks for looking!
 
Boomhut emoticon
Have a creative day!


Wednesday, May 29, 2013

Club Scrap Cape Cod Blog Hop

WELCOME
to another wonderful
blog hop.
 
This time we present to you
the May kit called "Cape Cod",
and honestly this is going to be another
of my favorite kits! The designers at
Club Scrap keep on amazing me:
I have too many favorite kits :-)
 
I hope you have arrived her from
Tricia's blog, with her wonderful ideas
of using the kit in the most efficient way.

I start with sharing one of the ALSB pages (#7)
of this kit. Have you never tried ALSB: assembly
line scrapbooking? It is the best way of using
the papers that come with you kit in the most
effective way. You get 13 wonderful pages out
of one pizzabox. You find all of the
ALSB instructions here:
 
On to some cards!
I have found lately that
pop up cards seem to be in fasion
and there are many dies for fancy
cards you can buy, but how about
the easy way, no die needed!
You know I go for the
easy to make cards. Here are
some instructions:
 
You need one piece of 12x12 inch
scrapbook paper. I used the
light blue print paper of this kit.
Some cut outs, and stamps.
Ruler, spencil, scissors
and glue or double sided tape.
 
If you click on these instructions,
they are easier to read.
 
1. Cut your 12x12 inch paper in 3 strips of 4"x 12"
 
2. fold them all in half.
 
3. For the pop up card you need 2 pieces.
So you have one piece left for another card.
 
4. Take one of the folded pieces and your pencil
and ruler. Now fold the card close and
measure 3/4" from both outsides and mark
on the folded side of the card.
5. Cut one inch towards the inside of the card.
 
6. Open the card and fold the just
cut part towards the inside of the card.
Now you have a little platform
where you can stick you image to pop up.
The card looks like this now:
7. The second piece of folded
4"x 12" is the outside of the card
to cover up the part where you have made the cut.
 
Now here is my finished card:
This is the front of the card,
with ribbon and a piece cut
from the designed scrap paper.
I added a few sticky pearls from my stash.

Now to fold open the card and
see what is inside.
 
This is the inside of the card.

I stamped the top part of the inside with
the rubber stamps and on  the bottom I
used the stencil that came with the kit.
The lighthouse is from one of the
 8,5"x11" papers. I hope you
see how easy it is to make this card.

 And from the left over 4"x 12"
strip I made another easy card :
Outside I used a cut out
and a stamped image
and the left over part of the cut out
you find inside of the card.
 
Now on to some more inspiration.
Your next blog to visit is:
where she has more tips
and wonderful ideas ready for you.
 
If for some reason you lose your way,
or have a bad connection, there is alwasy
the master list on the
to help you navigate to all 18 of
the participating blogs.  


Have a creative day!
 

Sunday, May 26, 2013

Sunday Scrap Page: scrappy border

Theme for today is: Self-Portret
and because I have lost quite some weight,
I share with you two pictures to show
the difference between then and now:
before and after.

I also made this page for the May 5 challenge:
scrappy border.

Papers are Club Scrap Artifact

And for the border I used a few
different stamps by Michael Strong:
the square
the circle
and the octagon

This is what I did:
I took 3 colors of paper.
On each of the papers I used
one of the stamps.
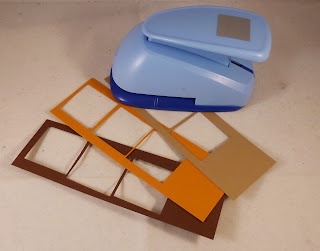
Than I cut the shapes and punched
out the circles.

I arranged everything on the background before
sticking it down, so it was the way i liked it.
The little squares are stickers from the
Club Scrap Artifact kit.

Thanks for looking,

Have a creative day!


Saturday, May 25, 2013

Saturday Sketch: Technostamper 264 and Club Scrap again


Today I made a sketch from  one of my favorite blogs:
The Technostamper
You find all info here:
http://technostamper.blogspot.nl/2013/05/monday-lunchtime-sketch-challenge-264.html

Of course  I used Michael Strong Stamps:
The Little Houses and a sentiment
The paper is Club Scrap
from the kit Equestrian November 2012


The bird is a punch by Stampin'Up!.

The squares are all punched out and
stamped on with stamps to give the
papers a more interesting look.
 I have a tutorial done in 2009 if you want to see more details:
http://craftchaos.blogspot.nl/2009/10/quilt-kaartquilt-card.html
I love this technique for it is great to use
the scraps that are on your table.

When it comes out of the die, it looks like this.

And here is the finished card.
The paper and stamps of this card are all Club Scrap
from the kit Equestrian November 2012.

This card is made for the Die Cut challenge (May 12).

 Have a creative day!


Monday, May 20, 2013

Club Scrap Challenges you!

Still Scrapbooking Month at Club Scrap
with a challenge every day. Here are some of
my cards.

Above was a card for a sketch challenge
Image


This card, with my favourite
coffee stamps, was for the thorn paper challenge.

Here my card for the 
rainbow challenge,
with punched out flowers 
in rainbow colors.

For the doodle challenge I used 2 different
flower stamps and doodled in and around them.

And this one is for the petal challenge.

I am so glad I have some papers lying around!

Have a creative day!