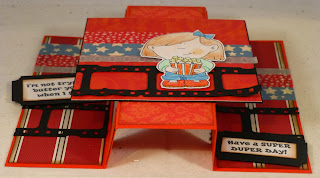
Welcome to another fantastic
This time you see the use of the September
papers and stamps from the Take Wing kit.
Have you come over from
Tricia's wonderful
blog with all her great ideas?
Well if you get lost, you can always find all the partipants
I also have a sidestep on the
Technique Junkies Design Blog
with a technique card:
So here is my special project
that I want to share with you.
It is not my own idea, it was a friend
that showed this booklet to me
and I knew right away I wanted to make
this booklet for my retreat memory book.
I will be at the October retreat and hope
to meet up with many old and new Club Scrap friends.
This booklet is 5 inch by 6 inch and inside has
many pockets to put in memorablia.
The big stamp is from my first retreat.
The black letters are chipboard letters
fromthe Hopekit.
A view on the inside of the book:
5 pages each with 3 pockets.
The back of the book with a stamp we got
last year at the retreat.
A closer peak at the inside of the booklet.
A little stamping only for I wanted to leave
space to add all the items fromthe retreat.
For sure i will share this book again
when it is filled with wonderful memories
after the retreat.
Ok now you want to know how I made this:
The covers are 2x 5 1/4"x 61/4 chipboard
covered with the white printed 8x11 inch paper.
The spine of the book is green covered grunge paper.
Here you see the outside.The green spine is
glued 1/2 " over the front and the back cover.
The inside of the outside over.
The middle part is the bendable part.
Let is dry real good before you add the inside pages.
Now you want to know how tomake the inside pages:
You need to cut the paper down to 10 x 9 "
and this is the template:
in paper it look like this:
Folded in half you contruct the pocket.
When folded, you have two flaps on the
outside. You can use a border punch
if you like on these flaps for decoration.
These flaps should be on the left side of your page.
These flaps are used to put the book together.
Glue on top and bottom (use some red heavy tape
or a line of bookbind glue), so a pocket is constructed
on each page.
This is just to show you the front of the book
will be glued to the cover.......do this after you have
covered this chipboard with design paper.
For the backside you need to cut an extra stripof
5x5 inch,fold in half (lengthwise) add the punch
border and glue to last page and cover (after decorated
with design paper).
These are the tags that ore inside the pockets
with only a little decoration for now,
but it will be filled after the retreat with lots more.
Hope it all makes sense to you, but
you can always
email me if you have questions.
Now let's hop on and see what
the ever creative
Kay has for you
Happy Hopping!
Have a creative day!


