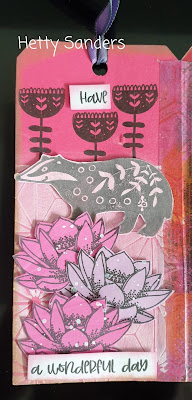
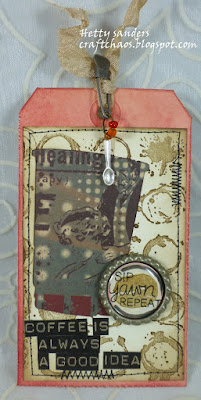
Showing posts with label tag book. Show all posts

Monday, June 21, 2021

Tag Book


Good Morning Crafty Friends!

Been some time since I post, but then again I have something for you. 
I made a tag book and that is for real 12 tags all together!
Nearly all the materials I have used to make this book are by:
stamps, stencils, washi tape, papers, brushes and dies.
I started my project by cutting these colorful tags with a 
Bigz tag die by Sizzix/Tim Holtz.
Next I used washi tape on the front and the back
to tape two tags togeter. You find  the washi tape

Some tags i decorated with the colorful kaleidoscope
paper that you find HERE.

Then I went ahea by using distress inks,
stencils and the Funky Fossil brushes.
This stencil is called Make Art.
and the brushes can be found HERE.

The stencil here is called Make Your Mark III.

Here you can see all the tags I made
and maybe you are inspired.


Here the back of the card.

This is the front of the book before
I bound it all together.

And now a little about how I bound
them together: The easiest way!
I stacked all the two by two tags
and sew them together with the colorful floss.
In the heart of the book I made a not.

I used some colored floss I found in my stash.
To bind all the pages together I have a long piece
of floss towards the outside and just wrap
it around the book and tie it with a not and a bow.

I added this ring to the front ribbon.

You find all the stamps and other
materials here:

Thank you for looking,
stay safe and
keep crafting!


Friday, June 24, 2016

Summer Coffee Lovers Blog Hop:Day 8 last one :-(

And then the last day of the 
So today I have to finish my tag book.
If you have missed the start of the making of thisbook,
you can go back and see it HERE.

So here the pagewith the last tag.
For this i used the freebie image found on

The envelopes are decorated with butterflies
and sentiments fromCreate with TLC. This
is also a freebie on the blog HERE.
The cups are the freebie from STAMlorations.

And here is the tag out of the pocket.
Vintage photo and worn lipstick distress ink and  stain
are the main colors of this tag.

Before adding the elements I also used a coffee stain embossing
folder on top of the colored background.

The honeycomb die cut is one of the new 
Tim Holtz thinlits. The flowers are also colored with
the distress stain.
Now the book is nearly done.
These are the inside pages on the back.
I took some pictures in the garden this week
and this is the result. I used Verve stamps
on thes pages.

This is the back of the book,with Tim Holtz stamps and
embossing folder and a Verve Stamp freebie sentiment.

And  to end this last day of the  Summer Coffee Lovers Blog Hop
I have a little Giveaway
for  one of you who have left such wonderful comments this week
 these cute little stamps.
I will announce the winner on Sunday.

Thank you for all your wonderful words.
Thanks Amy and Team for a wonderful and inspirational week.

Thanks for looking.
Have a Java great day!


Thursday, June 23, 2016

Summer Coffee lovers Blg Hop: Day 7

Yesteday I shared with you this booklet and part
of the inside. Today I have 2 more pages and tags.
If you missed it, have a look HERE.

Have you been to the main blog post of the
There you find all the info on how to
upload your project and might be able to win 
one of the fabulous prizes from the Super Sponsers.

The tag in this envelop is my variation on the
June tag for Tim Holtz challenge of the 12 tags,
so these pages are decorated with the cup
from Tim's die.

IThe cup is cut with the die and I was able to position
it so that I cout use it for this tag. Behind the cup I added
a piece of Club Scrap Hypno Vintage paper.
The background is a rubber stamp by Tim Holtz.

On the top of the tag you find a little coffe spoon charm.

The bottom part of the tag in a close up.
The bottle cap has a bean stamp from Club Scrapand a sentiment
from Newton's Nook stamp set.
The sentiment is a dymo font that I printed with the
computer. You can download this font free
from dafont.com.

And the other tag is made with the free images
from Verve Stamps and those you find HERE.
Here is the decoration on the
envelopes. For this I used two different
Tim Holtz stencils and a white inkpad.

And this is the festive tag finished,
but iIhave a little step by step how I did it:

I used these two stencils: the stars and the stripes,
a babywipe and two colors of distress ink.
So add the ink first to the tag. Either with the
direct to paper technique or us ablending tool 
to color the paper. Lay the stencil on top
and remove ink with a baby wipe. 

This is the result after the stencils 
are removed. When you heatit wth the heatgun
the white becomes even more visable.

Print the images and color with distress ink
or distress stain and a paint brush.

Here you see a close up of all the images.
The sentiment is cut out with a punch and
als adding some ink to fit in. The ribbon is colored
with distress stain and the topof the coffee cups
have a little glossy accent to make it look like plastic.

Thanks again for looking and come back for
the last tag in my book tomorrow....
the last day of the Summer Coffee Lovers Blog Hop.


Tuesday, March 31, 2015

Club Scrap Artist Team: Nice to See you


Every month the Artist Team members
get a project or papers in their pizza box
to come up with something extra.
This month the "Nice to See You" kit 
is what we all play with. You find all the elements here.

On the Club Scrap Blog you find all of the projects 
from the Artist Team and some have more on there blog
 (there will be links to click on).


I came up with these trays for my scrap room.
I can add some little trinkets, project booklets
and other keepsakes in these boxes.

I started out with a piece of wood my DH had in the
garage. He added a metal hook on top so I could
hang my project when finished.Then I painted it dark orange.
If you wonder how long it is: 21 inch.

With the stencil that came with this kit I decoated
with dark brown glitter ink on top.
Here you see it when the stencil comes off.

For the trays I used 3 different decorated pieces
of scrap paper 12 x 12 inch. I scored them 
at 4 and 8 inch horizontal and vertical.

Left and right I cut in the first block and with double 
sided tape I made the tray stuck together.

For the corners I cut out a circle and folded it twice
and cut in one line to form  the corner to glue
on both sides of the bottom of the tray.

Some of the lettering for the trays, I cut with
the cricut. I added them to astamped background.

This is the top. The eye is embossed
with clear embossing powder and a little
sticky red gemstone is added.

Inside the trays i have added these
little booklets for writing ideas.
The are made from a 3 3/4 x 12 inch strip of paper.
Then score at 3,5-4-4,5-5 and 5,5 inch.

After scoring,you fold the paper like you see 
here on the picture.

Cut some paper to fit in the the booklet,
either lined or just plain paper. You can see here
that the paper fits in the M-fold.
Hold paper and cover together while making a 
whole with a punch, before adding the brad to
fasten  everything together.
For the closing of the booklet, I made the right side
look like a tag,with slanted punched corners, a hole in the middle
for adding some rope or other material to close the book.

The outside of the book can 
be decorated with stamps.
Here you see the trays hanging in my craft room.


Thank your for stopping by.
Have a creative day!