Showing posts with label zoom class. Show all posts

Sunday, May 25, 2025

2025 Spring Summer Coffee Lovers Blog Hop


Dear Coffee Loving Friends,

I appologize for not blogging for a long time, but while there another Coffee Lovers Blog Hop going on it gives me reasons for starting the blogging again.

First you should go over to the
to see what is going on and what is there to win!!

Last night I had a zoom class by Michael Strong
and one of his cards inspired me to make this coffee card.
I used all Michael's stamps (except sentiment):
butterfly
mini coffee cup
cloisonne octagons
and a spoon die from my stash

Here are all the cards we made last night
and you can see the card that inspired me:
These zoom classes started during covid and are still going on.
Usually avery 3rd week of the month. You pay Michael and you
receive a package with materials for all the cards at home in
time for the class.
With the difficult posting to The Netherlands  get digital
instructions and make up my own cards as I have most of
the stamps. Feel free to send Michael an email if you want to


Thank you for looking and 

have a great caffeinated Sunday!


Saturday, July 23, 2022

"Mirror Mirror" Zoom class


Hello Crafty Friends,

Tonight I followed a zoom class by Michael Strong. 
For him it was morning, but with the time difference
 it was evening for me.
The theme of the cards was "Mirror Mirror", using mirror paper.

These are all the cards I made, but Mike's cards where a little different.
This is because, I do not get a package with all the parts, but using
my own stash of papers, dies and stamps.

Card 1.
I made this into a 5 1/2 x 4 1/4 size card
and found the moon image on google.
The stars I made with a SU! punch and the dots
with a white signo pen.

Behind the small suns (also a punch) are silver
circles, puched out.

The sentiment is printed with the computer.
 
Inside I used the star punch for decoration.

Card 2.
For this card I used the Bigz Clock die by Tim Holtz.
The clock is matt silver paper and inside shiny silver paper.
The disco balls are found with google.
The stars are made with the punch and also little 
silver sticker stars.

Card 3.
Silver sircles with yellow flowers all punched out.
The flower in the right hand top corner is a 
stamp by Michael Strong.

I stamped the flower twice and embossed the bottom one in 
silver and the top one with clear  embossing powder.
The leaves are hand cut.

Card 4.
Again the Tim Holtz Clock die in silver paper
and behind the clock soft silver glitter paper.
Varius punches used for decoration and sentiment 
made with the computer.

Card 5.
This mirror die, is not the one Mike used, but one I had from
Sizzix (very old one), but looks like a good mirror frame to me.
Flowers are punched out.

For more information about Michael Strong stamps
look HERE.

Thank you so much for looking
and have a lovely creative day!

Sunday, September 19, 2021

Touch of Midas


 Last night there was another zoomclass by
The theme of the class was:
A touch of Midas.
This was because on all the cards gold paper and gold
embossing powder was used. 
I will share with you all the cards we made:
Mine are not exactly as the ones Mike showed and sharded,
because I did not rceive a package of cards from Mike.
Not because it is late, but because here in the Netherlands
we have to pay extra VAT on packages from outside the EEG.
So on top of the zoomclass fee I had to pay an extra $7.
This makes these cards way to expensive. So...the solution
is that Mike sends me instructions via email and I use all
my own papers and stamps I have.
For this card the Silhouette Panel stamps where used
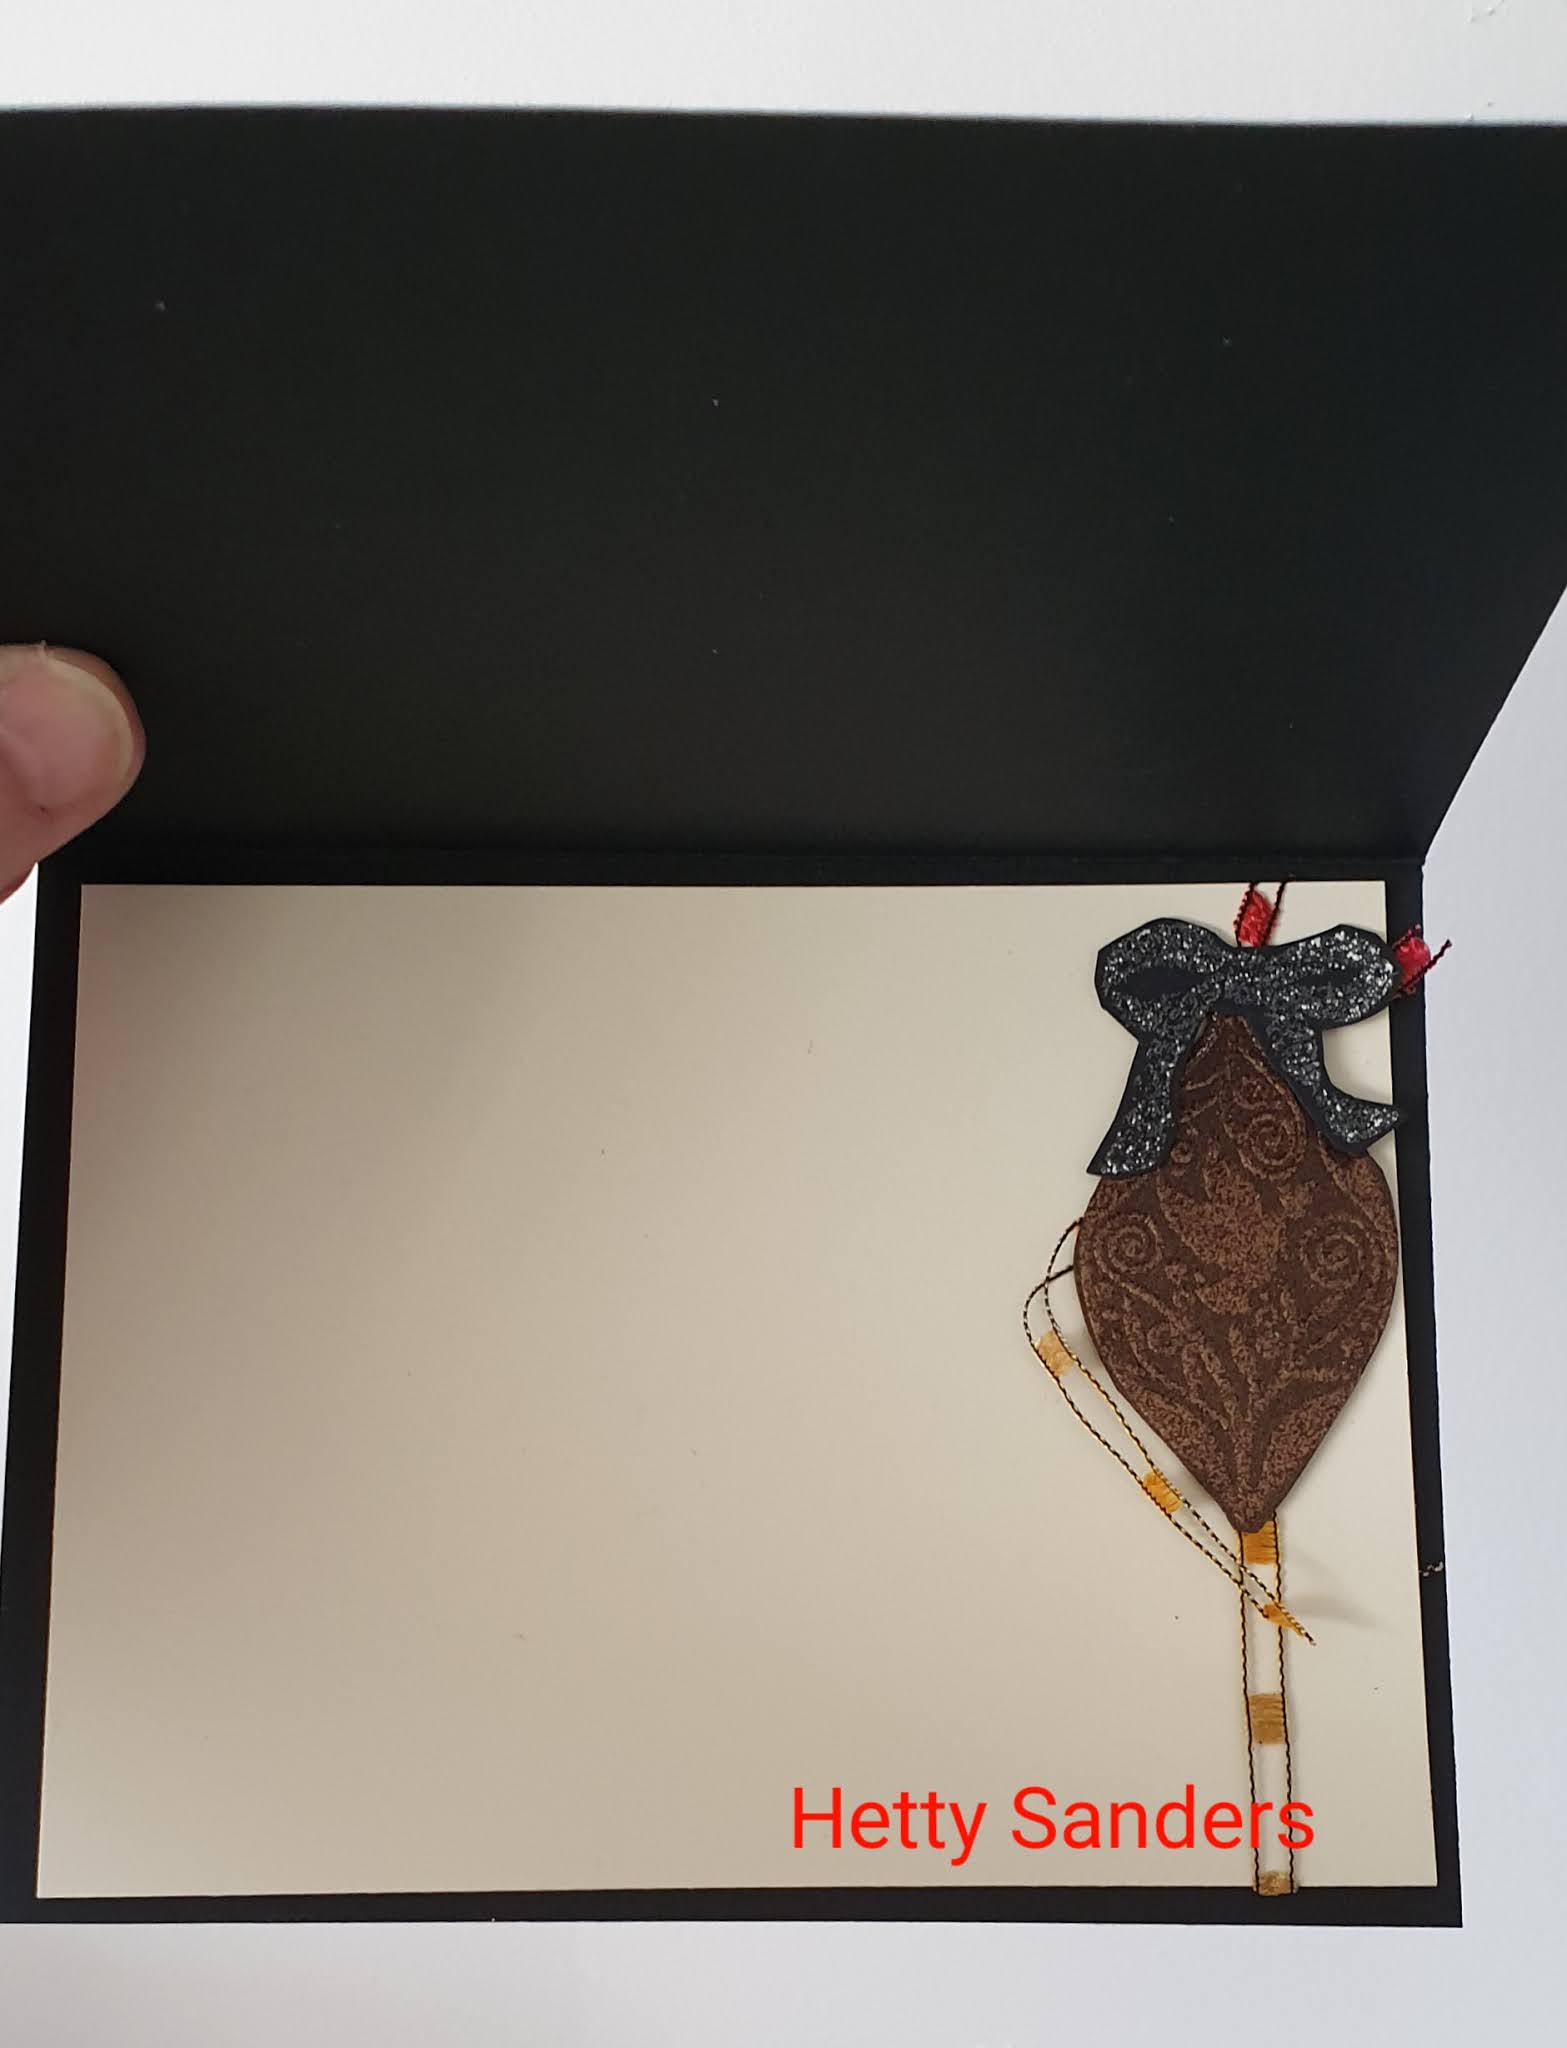
and a wide ribbon (one from my stash).
Behind iets panel there is a square of black, just a litte
larger than the stamped square.
For this card (we made the black one in class) the new mirror
image octagon stamp was used (not on the cataloge yet)
Stamp the image twice on black and one on white paper
both embossed in gold. Cut out and devide through
 the middle square. Great guy card!
So for this card you do not need any stamp (even though 
you see the small flower stamp - my own addition).

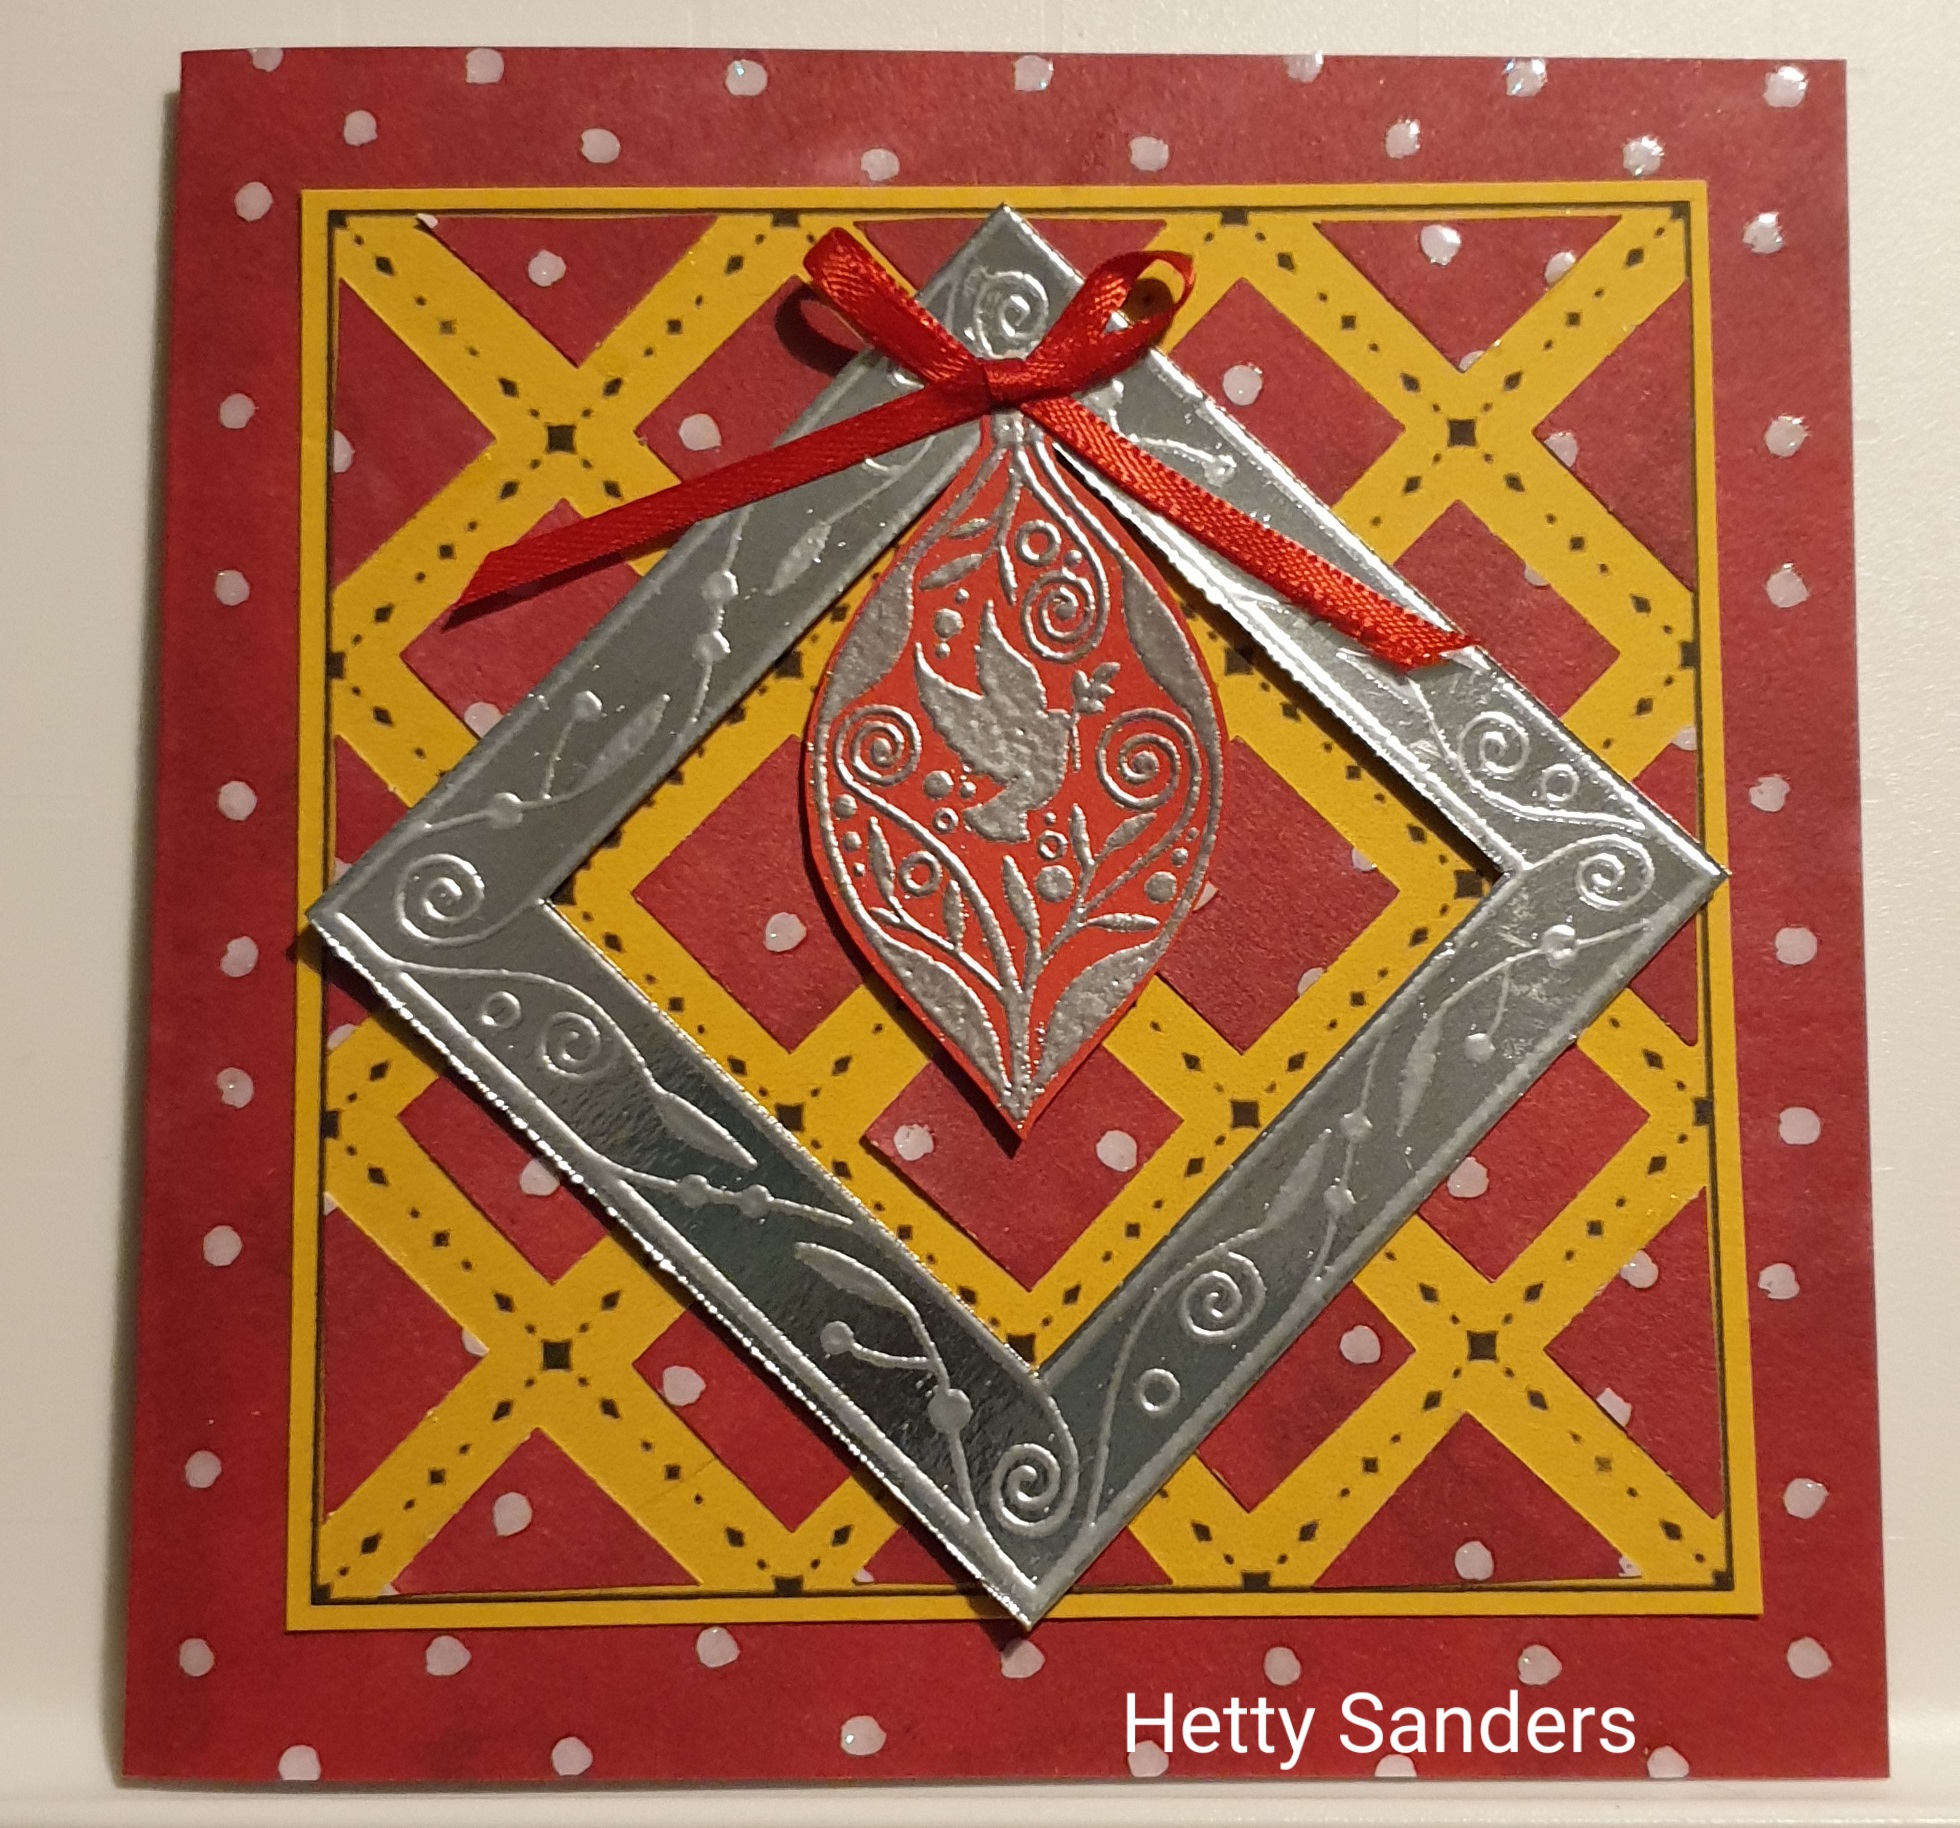
The left card is the one we did in class. It should have 
a real nice gold ribbon with leaves, but i did not have anything
like it in my stash, so I added the flower in the middle.
As from the instructions I was not sure of the grid measurements
(1 1/4 squares), I made the smaller squares and the blue version
is my own with little blue dots scattered over the grid.

The tiny squares are punched out of a piece of embossed
gold paper.
For the left card I used one of the accent stamps and the small flower.
Both embossed with gold on gold paper and cut out.
The background design and green paper are from my stash.
Instead of a ribbon that was used on the original card, I used 
this beautiful wool from my stash as well as some sticky glitter
accents.

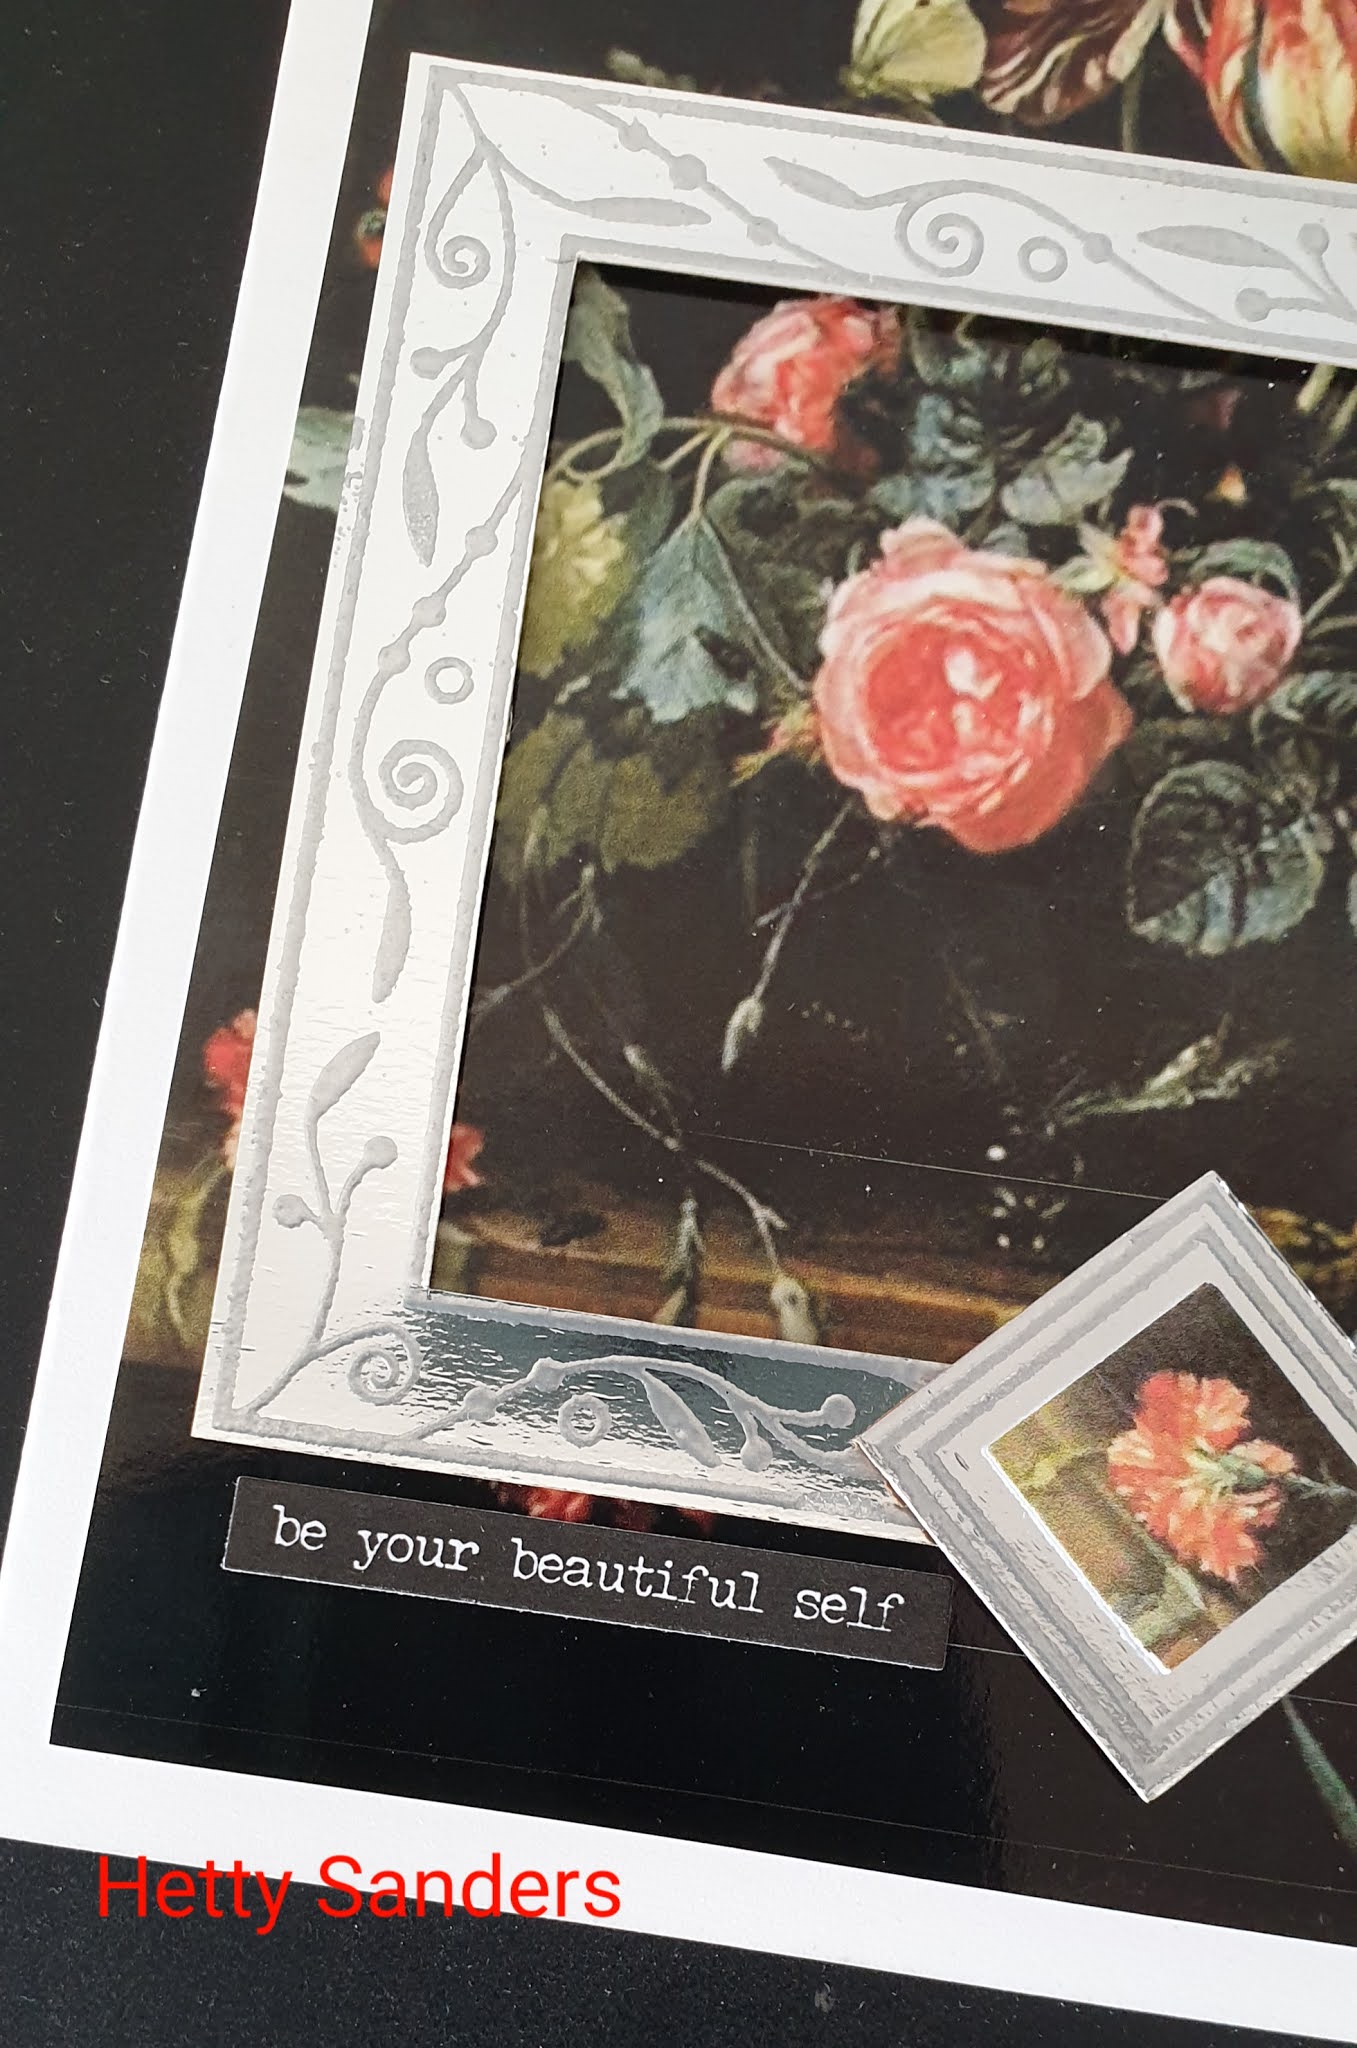
The right card was the easiest card. I received these panels to
print and cut out to attach on top of each other with some foam
tape. Around the flowers I used a gold pen (not very visble on the photo).
Out of my own I added the gold ribbon and the sentiment (Dutch for
gett well).

               So this card is inspired by Mike's card, but I had to make
 the background myself. And the circle should be a hand stamp,
 but I did a lot of searching through my stamps 
(I have it!!), but could not find it.

For the background I used several distress oxide inks and then I
used the stencil (Mike's design by Club Scrap) and on top I
stamped Mike's handstamp that wass issued 11 years ago for
a retreat by Club Scrap, where Michael was a guest designer.
The kit of this retreat was called Connection and came with wonderful
papers, this stencil and more rubber stamps.

The round circle stamp (matching the stencil) is from the set 

Feel free to come over to our Facebookgroup for more
information:

Thank you very much for looking.
Stay safe and keep crafting.


Sunday, November 22, 2020

Michael Strong November zoom class


We had another great zoom class with 
We have this every month and I am so happy 
to see a lot of my online friends and craft together.
We all are send a package with 5 cards including
all the elements you need to make the card.
So last night (for me, but early morning in
San Diego) I made these cards:


The first card we made, was this grid card.
We did it before and I love doing it.
Mike has the grid for you on his blog.

As we did not get enough little squares, 
we made a different card than originally planned.
As i went ahead making this one, I made my own variation
with some extra colors from my own stash and added
 a stamped sentiment.

 Card number 2 is this beautiful peacock card with
some amazing peacock ribbon and matching sequinces.

Card number 3 is ready for Christmas.
We were given these embossed background strips
and the dove baubles (stamp by Michael Strong here).

I added the bows on top. That is a stamp from the 
set Jars of Love by Stampin'Up!
The sentiment is from the words stampset by Mike himself
(only not available anymore).

This is the inside of the card, where I used the
4th bauble for decoration. The ribbon is a piece from 
one of the other cards.

For card number 4 we used a photo of a 
picture by Rachel Ruysch, a Dutch painter..
We received stamped squares, silver embossed on 
silver paper. This stamp is called 
Cloisoné Nesting Squares.
The sentiment I added is from a sticker booklet
with sentiments by Tim Holtz.
And the final card is an Autumn card. 
The leaves come from the stampset with the pumpkin:
the Pumpkin Harvest set.
Lovely ribbon and a little coloring.


Extra card from the leftover nesting squares.
I used the grid printed on yellow paper and the red
dotted design paper. Stamped the smaller dove bauble
and embossed it with silver embossing powder.
Everything goes perfect together.

One little square was left and I used it for the inside
With a stamped sentiment and a strip of the same
paper as used for the front.

Maybe I see you in the December class?
It is on December 12. Info on Mike's facebook.

Thank you for looking,
stay safe and
keep crafting!


Sunday, September 27, 2020

September Zoom Class with Michael Strong


Last night I was in a zoom class given by Michael Strong.
For him it was his morning class :-)
We made 6 cards this time. The 6th was a fun extra card!!

Here you see all the cards we made. They were fun folded cards
and below i show you the folded cards one by one.

This is a kind of lock fold. The hexagon is one of
Michael Strongs rubber stamps.
I made a mistake on the left side, so mine looks
a little different than it was supposed to look.

For this fun fold we received all the sunny paper already cut to size.

Yes, when you take part in the class, you receive all the cards  and all parts you need, ready cut at home! Wonderful!!

For this fold, Mike used  his flower stamp, that was embossed with gold embossing powder.

Great fun fold, looking like a lock fold.
I did some coffee decoration on my own account.
It is National coffee day soon (September 29) and there
will be a Coffeelovers Blog hop!

This was the surprise card. A wonderful Halloween card with: a coffee cup!! Yes, the cup is made into a monster cup by using it upside down. I love this idea.

Here a close up of the cup, with its funny googly eyes, strips of hair and yellow teeth.

And this is the last card. On the right you see the card we made in class
and on the left you see a card I made from this idea.

Another coffee idea. You find Hetty's coffee cup rubber stamp HERE.
I used a coffee bean embossing folder.
The coffee rings are a wooden stamp from Club Scrap.
The steam stamp comes with the coffee stamp in a set.

The sentiment is by Verve Stamps.

So would you like to participate in one of Michael Strong's
zoom classes? Well, the next one is on October 24.
You can send Mike an email:
mike@strongstamps.com

or become a member of the Facebookgroup:

Thank you for looking,
stay safe and
keep crafting.


Sunday, August 30, 2020

Michael Strong's monthly zoom class: August


At the end of each month Michael Strong
organizes a zoom class, not that the stores are closed.
This is a wonderful opportunity for those of us, who cannot
attend his classes, because we live too far away,
to be able to participate through the computer!

Michael makes us each a package of cards that we will 
assemble during the zoom class.
You pay $ 25 (incl. postage) and he will send the
package to your home address. It is a lot of fun to see
everyone , craft and chat at the same time.

Above you see the 5 cards we made this month and
I always give it my own touch too.
Card 1: I added the circle stamp on top with a pink
sticky pearl. Lost one of the flower punch outs,
so I added a bigger pearl there.

Card 2: for this gatefold card I added the 
cloisonné craines (not available anymore).

On  card 3 I added Mike's mini heart stamp in the circle
with some gold holographic dot on it.

Card 4: with a grid background, where we had to add
all the punched out squares and circles. I added
Mike's gold embossed mini flower with foam tape.

This is the inside of the card.
Here I added also a flower stamp.

For this card # 5 we needed a gris to add all the punched
out squares. Mike will adde this grid to his BLOG,
so you can try this too. You find the butterfly stamp here.

I loved the grid and scanned it and printed it out to
make some cards of my own. Here is one with
Mike's latest star stamp (soon in the catalogue)

And another variation is this one with the shell stamp.

Hope you liked seeing all the cards and now
you think to yourself: I want to attend too!
Well the next class is September 26. There will 
be two sessions. If you are interrested send an email
to Michael Strong: stamper.strong@gmail.com

Thank you for looking,
stay safe and
keep crafting!