Showing posts with label handmade cards. Show all posts
Showing posts with label handmade cards. Show all posts
Sunday, October 9, 2022
Sunday, August 28, 2022
Michael Strong Zoom Class: Animals
Welcome Crafty Friends,
Last night (for me, but morning in San Diego California)
tere was the monthly wonderful zoom class by
Michael Strong.
You find all the stamps I used for this class here:
Remember, I do not get a package of cards, but digital
files with measurements and pictures. I use what i have in my stash.
This class was about 5 different animal stamps designed by
Michael strong himself.
Card #1 Giraffe
I stamped the giraf on white paper and scanned it.
This way I could manipulate the image in photoshop
(with the help of a collegue). Then I printed the
image on orange paper. The border is a picture I found
on internet.
The leaf is a stamp that comes with the giraffe stamp set.
Here the inside of the card.
Card #2 Seahorse
Here I stamped the seahorse on blue paper and colored them
with pencils. The border is made with 2 different sizes of
punches, hologram stickers and blue gemstones.
Inside the card there is a piece of light blue paper.
Card #3 Pony
This stamp with black ink on white paper and colored with pencils.
Next I scanned the pony before cutting out.
I used a piece of a horizontal rectale and enlarged this to make
up the border. The tiny beads are on a piece of wax thread with
nots to hold the beads in place.
I printed the border twice and used it also on the inside of the card.
Card #4 Panda
The size of this card is 4 x 7 inch.
The background panel si stamped with the bamboo stamp
from the panda set with red ink.
5 Pand's are glued to a accordeon folded strip
and are hidden behind this flap. The tssel pulls out the
strip of panda's. I made the tassel with embroidery floss.
The decoration on the flap is 3 punched out flowers
and a circle stamp with chineese characters (embossed
in gold and by Club Scrap).
For the inside I used another stamp from the set.
A row of tiny panda's. Also great to use on the
envelop.
Card #5 Elephant
Of couse again started this card with stamping the elephant and
used pencils to color the image. After cutting out, I put it asside to
make the card. The size of the card is 5 1/2 x 5 1/2 inch.
Embossed pannel on the front with punched out flowers and a
tiny golden gemstone.
Inside a small panel decorated with the flower that comes
with the stamp set and also colored with pencil.
Finishing the card with 3 flowers in the same colors as
on the front side of the card.
Thank you so much for looking and the next zoom class
will be purple cards on Saturday September 24th.
If you are interrested to take part in the class feel free
to email Michael Strong: stamper.strong@gmail.com
Have a creative day!
Labels:
animals,
beads,
elephant,
giraffe,
handmade cards,
Michael Strong,
panda,
pencil,
pony,
seahorse,
strongstamps
Saturday, July 23, 2022
"Mirror Mirror" Zoom class
Hello Crafty Friends,
Tonight I followed a zoom class by Michael Strong.
For him it was morning, but with the time difference
it was evening for me.
The theme of the cards was "Mirror Mirror", using mirror paper.
These are all the cards I made, but Mike's cards where a little different.
This is because, I do not get a package with all the parts, but using
my own stash of papers, dies and stamps.
Card 1.
I made this into a 5 1/2 x 4 1/4 size card
and found the moon image on google.
The stars I made with a SU! punch and the dots
with a white signo pen.
Behind the small suns (also a punch) are silver
circles, puched out.
The sentiment is printed with the computer.
Inside I used the star punch for decoration.
Card 2.
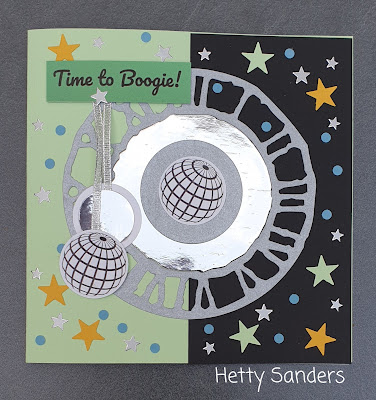
For this card I used the Bigz Clock die by Tim Holtz.
The clock is matt silver paper and inside shiny silver paper.
The disco balls are found with google.
The stars are made with the punch and also little
silver sticker stars.
Card 3.
Silver sircles with yellow flowers all punched out.
The flower in the right hand top corner is a
stamp by Michael Strong.
I stamped the flower twice and embossed the bottom one in
silver and the top one with clear embossing powder.
The leaves are hand cut.
Card 4.
Again the Tim Holtz Clock die in silver paper
and behind the clock soft silver glitter paper.
Varius punches used for decoration and sentiment
made with the computer.
Card 5.
This mirror die, is not the one Mike used, but one I had from
Sizzix (very old one), but looks like a good mirror frame to me.
Flowers are punched out.
For more information about Michael Strong stamps
look HERE.
Thank you so much for looking
and have a lovely creative day!
Labels:
bigz die,
handmade cards,
Michael Strong,
mirror,
paper punches,
rubber stamp,
zoom class
Sunday, May 2, 2021
More Furry Friends 2
Hello Crafty Friends,
More dog cards today, for i have many ideas in my head,
The set I used is More Furry friends
and you find it on the Funky Fossil Designs site.
The paw print you see on this card is an embossing folder.
This dog was easy coloring ;-)
And with some papers from the first card i made this second on.
The red card and the circle embossing print.
The big dog bone i drew by hand and cut out.
I added bit of grey ink all around.
You see I also used the Paw Print background again.
No need for printed design paper.
So much fun to use the stamps
on the back of the card.
Thank you for looking,
stay safe
and keep crafting!
Labels:
clear stamps,
dog,
embossing folder,
Funky Fossil Designs,
handmade cards,
paw,
stencil
Saturday, January 16, 2021
Day 4 and 5 of the new stamps by Funky Fossil Designs
Dear Crafty Friends,
I have been so busy with work and makes,
that I have not shared the other two new sets by
The 4th new stamp set is called Blooming Wreath.
This is a wonderful set with a flower wreat,
flowers and cute birds. I have not even fully explored all
that is possible with this set but here are my first two
cards. One you see above and was started with
a piece of paper from the new 6"x 6" paper block
There is also wonderful new washi tape:
With only 2 flowers and a sentiment the card is
quickly finished.
The next card is also made with the flowers from the
set. These roses come in two sizes and the larger one
has a leave too. I colored the roses with zig markers
On top of the rosed I added silver glitter
embossing powder with an embossing pen.
The cute bird is also part of this set.
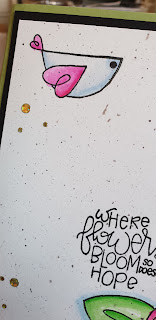
I added som splatter to make the background
more interresting.
For this card i used the girl from the
She is Fierce stamp set.
The last set that is new this month is
This set has lots of stamps and perfect for
mandala's, backgrounds and lots of creativeness.
Here I used one of the papers behind the stamped part of
the card. I also used the Paisly Petals stencil in the background.
I only used a few of the elements from the set, colored them,
cut them out and glued them to the card with foam tape.
For this card I went all out. This is an old technique called
Modern Grid by Technique Junkies.
You see I also used the Let's Party bunny and cat and
the Be.You.Tiful stencil.
All 5 new sets are now available at
Funky Fossils Design.
Sarah Gray, the owner, was also on
and you can watch the rewinds and get even
more ideas of what to do with the new stamps.
Thank you for looking
and I do hope you come back tomorrow
for I have a tutorial and a stampset to
give away!!
Stay safe, healthy
and keep crafting!
Labels:
bunny,
cat,
clear stamps,
design paper,
flowers,
Funky Fossil Designs,
handmade cards,
paisley,
washi tape
Sunday, December 6, 2020
Working on Christmas cards
Hello Crafty Friends,
Today I am working on my Tim Holtz Christmas cards.
I was in a way inspired by one of the live tutorials by Tim on Facebook.
If you have missed them, you can see all the tutorials on
I started with making my own splatterbox for
the backgrounds of my cards.
I made my backgrounds with speckled egg and
cracked pistachio.
Here you see the finished and dried backgrounds.On top I used several of Tim Holtz stencils
with distress ink. Here I used the new eustic wildernes
and here i used speckled egg distress oxide ink.
On top of the stenciled background I stamped a
sentiment for Christmas (Handwritten Holidays 1 and
mini handwritten Holidays)
and a tiny cardinal, that I colored with zig markers.
When all done I added walnutstain distress oxide
all around the panel.
The panel is finished of with red and white baker's twine.
Or with yellow and white baker's twine.
Thank you Tim Holtz for all your inspiration.
Thanks for looking,
stay safe and'
keep crafting!
Sunday, November 22, 2020
Michael Strong November zoom class
We had another great zoom class with
We have this every month and I am so happy
to see a lot of my online friends and craft together.
We all are send a package with 5 cards including
all the elements you need to make the card.
So last night (for me, but early morning in
San Diego) I made these cards:
The first card we made, was this grid card.
We did it before and I love doing it.
Mike has the grid for you on his blog.
As we did not get enough little squares,
we made a different card than originally planned.
As i went ahead making this one, I made my own variation
with some extra colors from my own stash and added
a stamped sentiment.
some amazing peacock ribbon and matching sequinces.
Card number 3 is ready for Christmas.
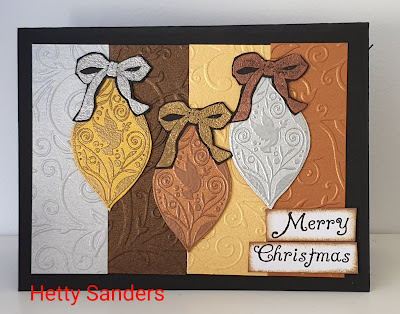
We were given these embossed background strips
and the dove baubles (stamp by Michael Strong here).
I added the bows on top. That is a stamp from the
set Jars of Love by Stampin'Up!
The sentiment is from the words stampset by Mike himself
(only not available anymore).
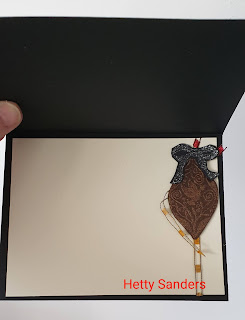
This is the inside of the card, where I used the
4th bauble for decoration. The ribbon is a piece from
one of the other cards.
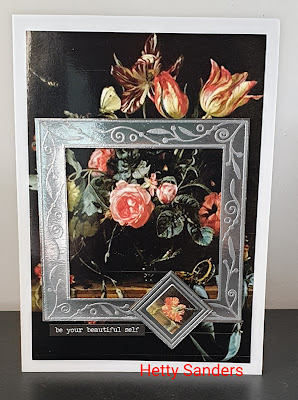
For card number 4 we used a photo of a
picture by Rachel Ruysch, a Dutch painter..
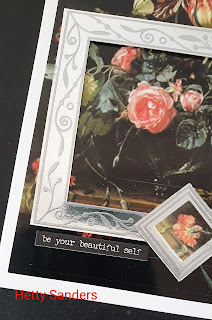
We received stamped squares, silver embossed on
silver paper. This stamp is called
Cloisoné Nesting Squares.
The sentiment I added is from a sticker booklet
with sentiments by Tim Holtz.
And the final card is an Autumn card.
The leaves come from the stampset with the pumpkin:
the Pumpkin Harvest set.
Lovely ribbon and a little coloring.
Extra card from the leftover nesting squares.
I used the grid printed on yellow paper and the red
dotted design paper. Stamped the smaller dove bauble
and embossed it with silver embossing powder.
Everything goes perfect together.
One little square was left and I used it for the inside
With a stamped sentiment and a strip of the same
paper as used for the front.
Maybe I see you in the December class?
It is on December 12. Info on Mike's facebook.
Thank you for looking,
stay safe and
keep crafting!
Labels:
christmas,
grid,
handmade cards,
Michael Strong,
rubber stamp,
zoom class
Subscribe to:
Posts (Atom)


