Showing posts with label independence day. Show all posts

Thursday, July 4, 2019

Happy Birthday America!

Here is my tag for the challenge
Stars and/or Stripes.

For my card I used
rubberstamps and a stencil by Tim Holtz
and the colored ribbons are by DL. ART.

Wishing all my American friends a 
wonderful celebration.

Thank you for looking
and have a creative day!


Wednesday, July 4, 2018

Progressive challenge Limited Runs


Here in The Netherlands it is a wonderful
hot and humid Summer day. A day to have coffee
outside in the garden and read a good book
under a parasol.

I have been making my card for the 
Limited Runs Progressive challenge
on Facebook. Every time we get a new
image to play with. This time it was 
a wonderful cupcake.

In the back i started with the Tim Holtz star stencil
and red and blue ink. Pieces of washi tape are also
for decoration and the finishing touch on the
background panel.

The coffee cup is a Stampin'Up! die and
Club Scrap Firecracker paper. The star on the
cup is an old SU! paperpunch.

And here is the cupcake. I colored it in photoshop
and printed the image 3 times  to make a 3d version
with foam tape in between and little sticky pearls
in the heart of the flowers.

The digital sentiment is by Verve Stamps. 
So sad that this shop has closed. 


I enter my card on the linky of the
for I used one of the sponsors images.
Limited Runs stamps also always provides a freebie
at the blog hops that are held.


Back to my coffee in the garden!

Thanks for looking 
and have a creative day!


Happy 4th of July!


With this card I wish everyone in the
USA a very Happy 4th of July  celebration.

I used the Club Scrap July sketch
and the June Firecracker hybrid kit.
Made this card in photoshop.

Thank you for looking
and have a creative day!

Friday, July 4, 2014

Happy 4th of July

With this card  want to wish all my American friends:

This card is also for the 65th card sketch

For the background of this card I used
the Michael Strong honeycomb template
with red and blue distress ink. I only slightly
used the color to have a soft touch.

For the focalimage i used the large cloisonné star
that you can find here. I stamped in black and embossed it black
on watercolor paper.I used the same red and blue distress inks for coloring. 
You press the inkpad to your craftsheet and spritz some water on it.
Now you have ink for coloring.
Some extra touches of glitterglue gold to make it more festive.

The sentiment is a Hero Arts stamp.

Thanks for looking


and have a creative day!


Wednesday, July 3, 2013

4th of July inspiration 4

After seeing the freebie on Create with TLC
I just had to make this tag.
You find the free image here:

Here is how I made this tag:
Start with a white tag and
distress stains in red and blue.
Now we do a technique called Bingo Blast by
 Apr/May 2009
What you do is you sort of throw the
top of the bottle on the tag to make the splash.
Cover all of the tag with red and blue
splashes.

Here a close up.
Click on the picture for an even closer look.

In combination with the splashes
I stamp a little star all over in black
archival ink

and the word happy  to make a background.

See the close up.

With red and blue distress ink
the border is colored.

Here the finished background.
One side blue and one side red ink.

For the ribbon first you stamp the star
in black archival. Then use the red and blue
ink with leaving some white in between.
Dry with heatgun.

The ribbon on the tag.

I cut out a red and a blue star
with my spellbinders, printed the 
and colored this with distress markers.

Behind the larger red star, I put some red white and
blue organza ribbons with a piece of tape.

Here the finished colored image and
the stars behind it.


Have a creative day!


4th of July inspiration 3

Today I have two things for you:
a tag with digital images
and a button bracelet.

Let's start with the tag:
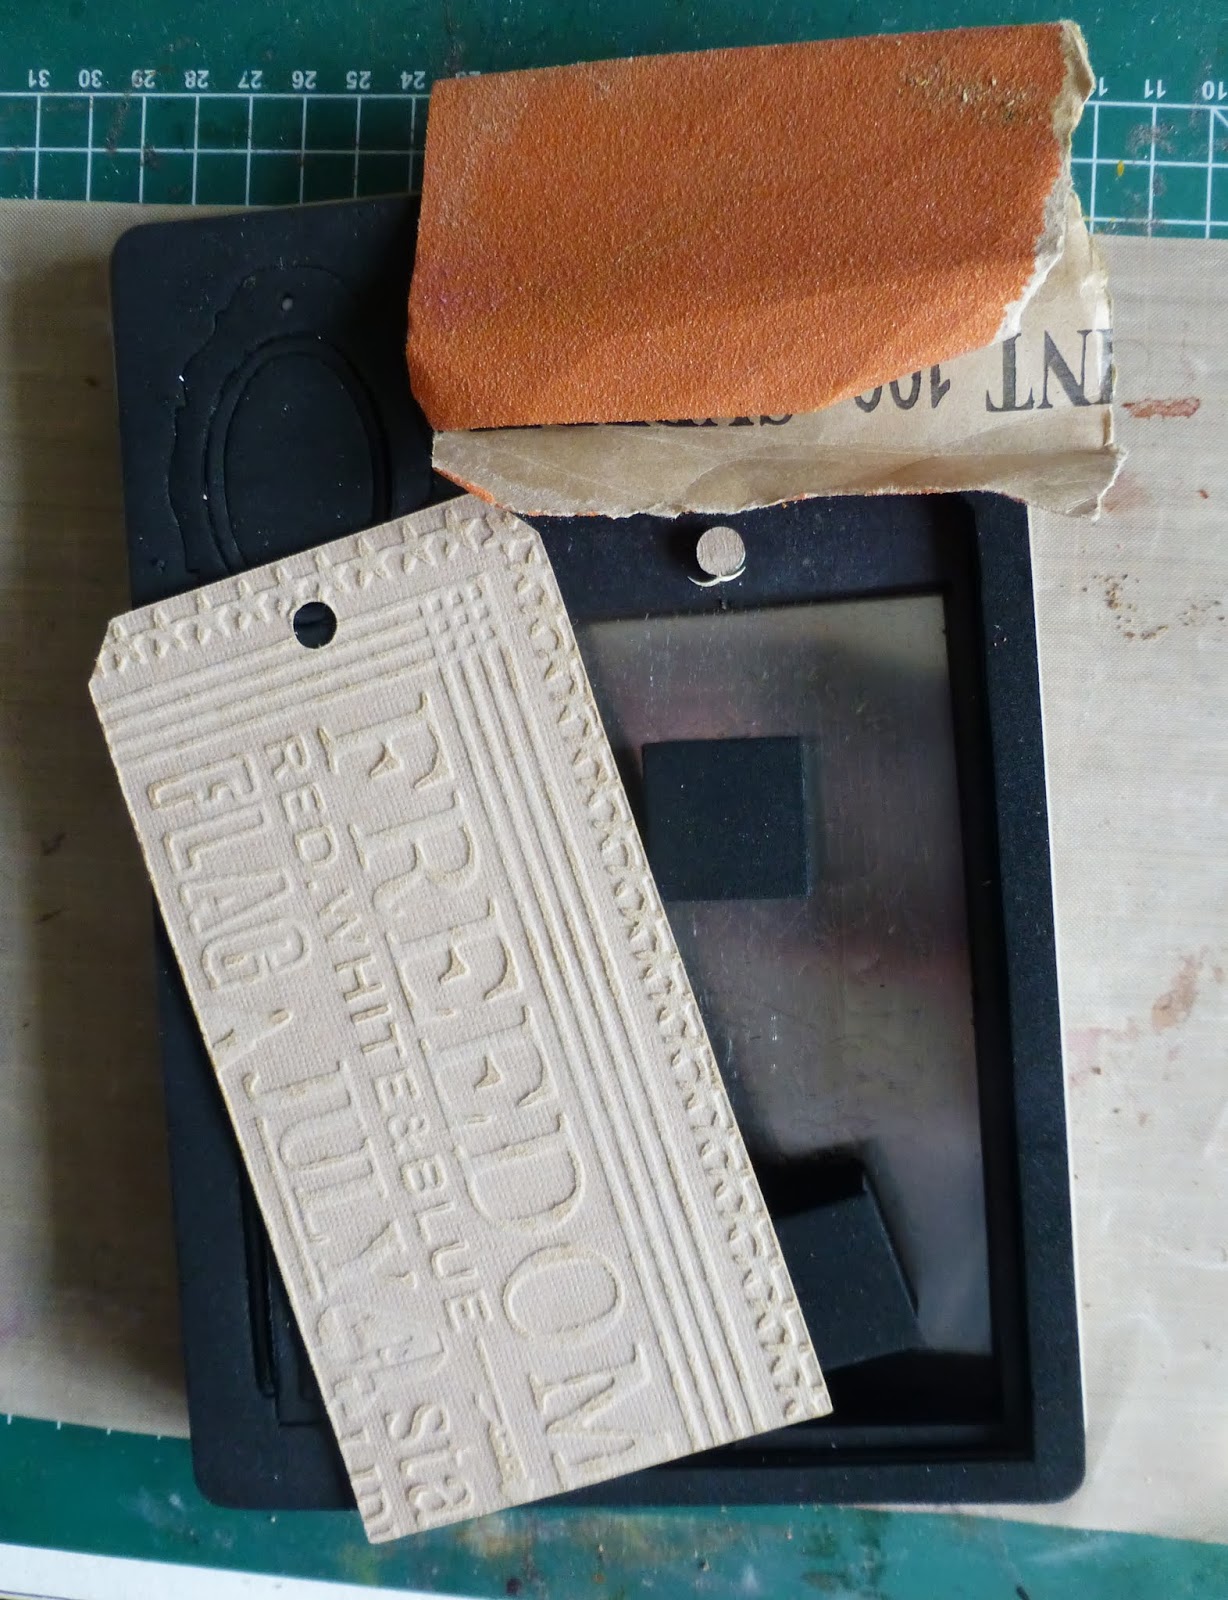
I made the tag out of pre embossed paper
from Tim Holtz called seasonal impressions.
If you want to know what die I use,
it is a Tim Holtz for Sizzix
and you can find it HERE.

I used strips of post it notes to cover parts of the tag
that i want to give another color.
Of course the tag will be red and blue.

With fired brick distress ink I colored the word 
freedom with a blending tool.

covering the red, now I use salty ocean for other
parts of the tag. Move the paper, every time you
want to color part of the tag.
This is how the tag looks after two colors.

And this is how it looks after finishing
with all the colors.
Finishing the tag with the distress tool
and vintage photo distress ink. 
I love the use of the washi tape, so here I add
a piece of white tape with blue stars.
Using Tim's idea of coloring the ribbon for the 
tag. I stamped the ribbon with black stars before
coloring it with red and blue distress stain.

Even though the background is great (as usual)
 I want to use some images on top.
These are digital images from
Create with TLC, that are printed
and colored with the distress markers.

Here a close up of the top of the tag:
a little star charm on the ribbon.
If you click on the photo you can see
 an even larger version.

And now for the bracelet:
get out your red, white and blue buttons
and a piece of ribbon (any of these 3 colors,
i used a white organza ribbon)
You find perfect easy instructions
in this youtube tutorial:


I am ready for the 4th of July
and you??

Have a creative day!