Wednesday, December 25, 2013

TJ Merry Christmas


More good wishes for Christmas.
Thes cards are done in a Technique Junkies
technique called Aged Krafty Color
and you find it in the latest Dec/Jan Newsletter.

 On top you find a card made with the new
Technique Junkies Stamps. And you can find a catalogue
with all the TJ stamps HERE.

This card is done with Tim Holtz
Christmas stamps and sentiment.
And this last card is done with the 
Club Scrap Gnome Holiday stamps and
all the cards are made with Club Scrap
Random Doorway papers.

This technique is lovely if you like the vintage style
cards and also if you like to make quick cards!

Have a creative day!


Tuesday, December 24, 2013

Merry Christmas


With this card I want to wish all my friends
a very Merry Christmas 
and hope you all have a wonderful and blessed time
with your family and friends.

Have a creative day!

Sunday, December 22, 2013

Sunday Scrap page: Family

Here is today's page and it is all about the family,
for that is the theme at the Weekly Chronicles over
at the Club Scrap forum.

This week I used Peacock papers in combination with 
Equastrian papers and of course Michael Strong
alphabet stamps.

Here you see the alphabet stamps on gold paper embossed
with purple glitter embossing powder.

These flowers are punched out
of the metal looking purple paper and the 
gold paper. 

Hope you al have a cheerful weekend
with holiday cheer!

Have a creative day!


Saturday, December 21, 2013

Hybrid cards for Christmas

Today I share cards with you 
that are a combination of stamping
technique (that I showed you in the
post before here) and digital stamps.

The sparkle stampisby Club Scrap and the
digital stamps and sentimentare by


This time you DO NOT start with the
stamped background,
but first print the image on your white card.

Next you stamp and emos the sparkles
in the sky and color the background.

Add pearls or glitter in the heart of the
sparkles, add sentiment and ribbon if you want.

Do take a look at the Create with TLC blog,
for there are also a lot of freebies for the 
Holidays.

Have a creative day!

Saturday card(s): Last Christmas cards

Here some of my final Christmas cards.
The gnome is so much fun to keep on using.
I noticed on the Club Scrap site,
the rubber is sold out, but you can always
downoad the digital version to use here
(thaen you can make the Gnome any size you want).

The stars and the sparkle stamps in the
background are also Club Scrap
The trees (with matching dies)

Now here a little explaining how the cards are made:
Start with the background. First stamp stars or a sparkly
background in vesamark and emboss with white
embossing powder. Then take a post it paper and tear
a strip to create the snowy ground. Use this to
cover the paper and then take blue ink to color the sky.
Because you embosed the stars they come through
the blue ink (you can use a soft cloth to clean the stars).
Stamp the tree and also embos in white.
Now use the dies to cut them out.
put the dieson the marked dots and run it
through your die cut machine.
You can also cut the trees out of plain paper and run
them through the crimper and add some white ink
for snow effect. Or you can add versamark
and  add glitter embossing.
With sticky gold dots I give the stars and the sparkles
some extra glam. Add your wish at the bottomof the 
card and adhere to panel and card.

Here are the finished cards:


And here are some more for your inspiration:


And I guess you also have a line with all your cards. I use pegs for this
and this year I have decorated mine with washi tape:
The (mini) star is also by Michael Strong.


Well, the Holidays are upon us
and i do hope you all have a jolly good time!

Have a creative day!


Tuesday, December 17, 2013

Gnome Globe

Another card idea with  the Club Scrap 
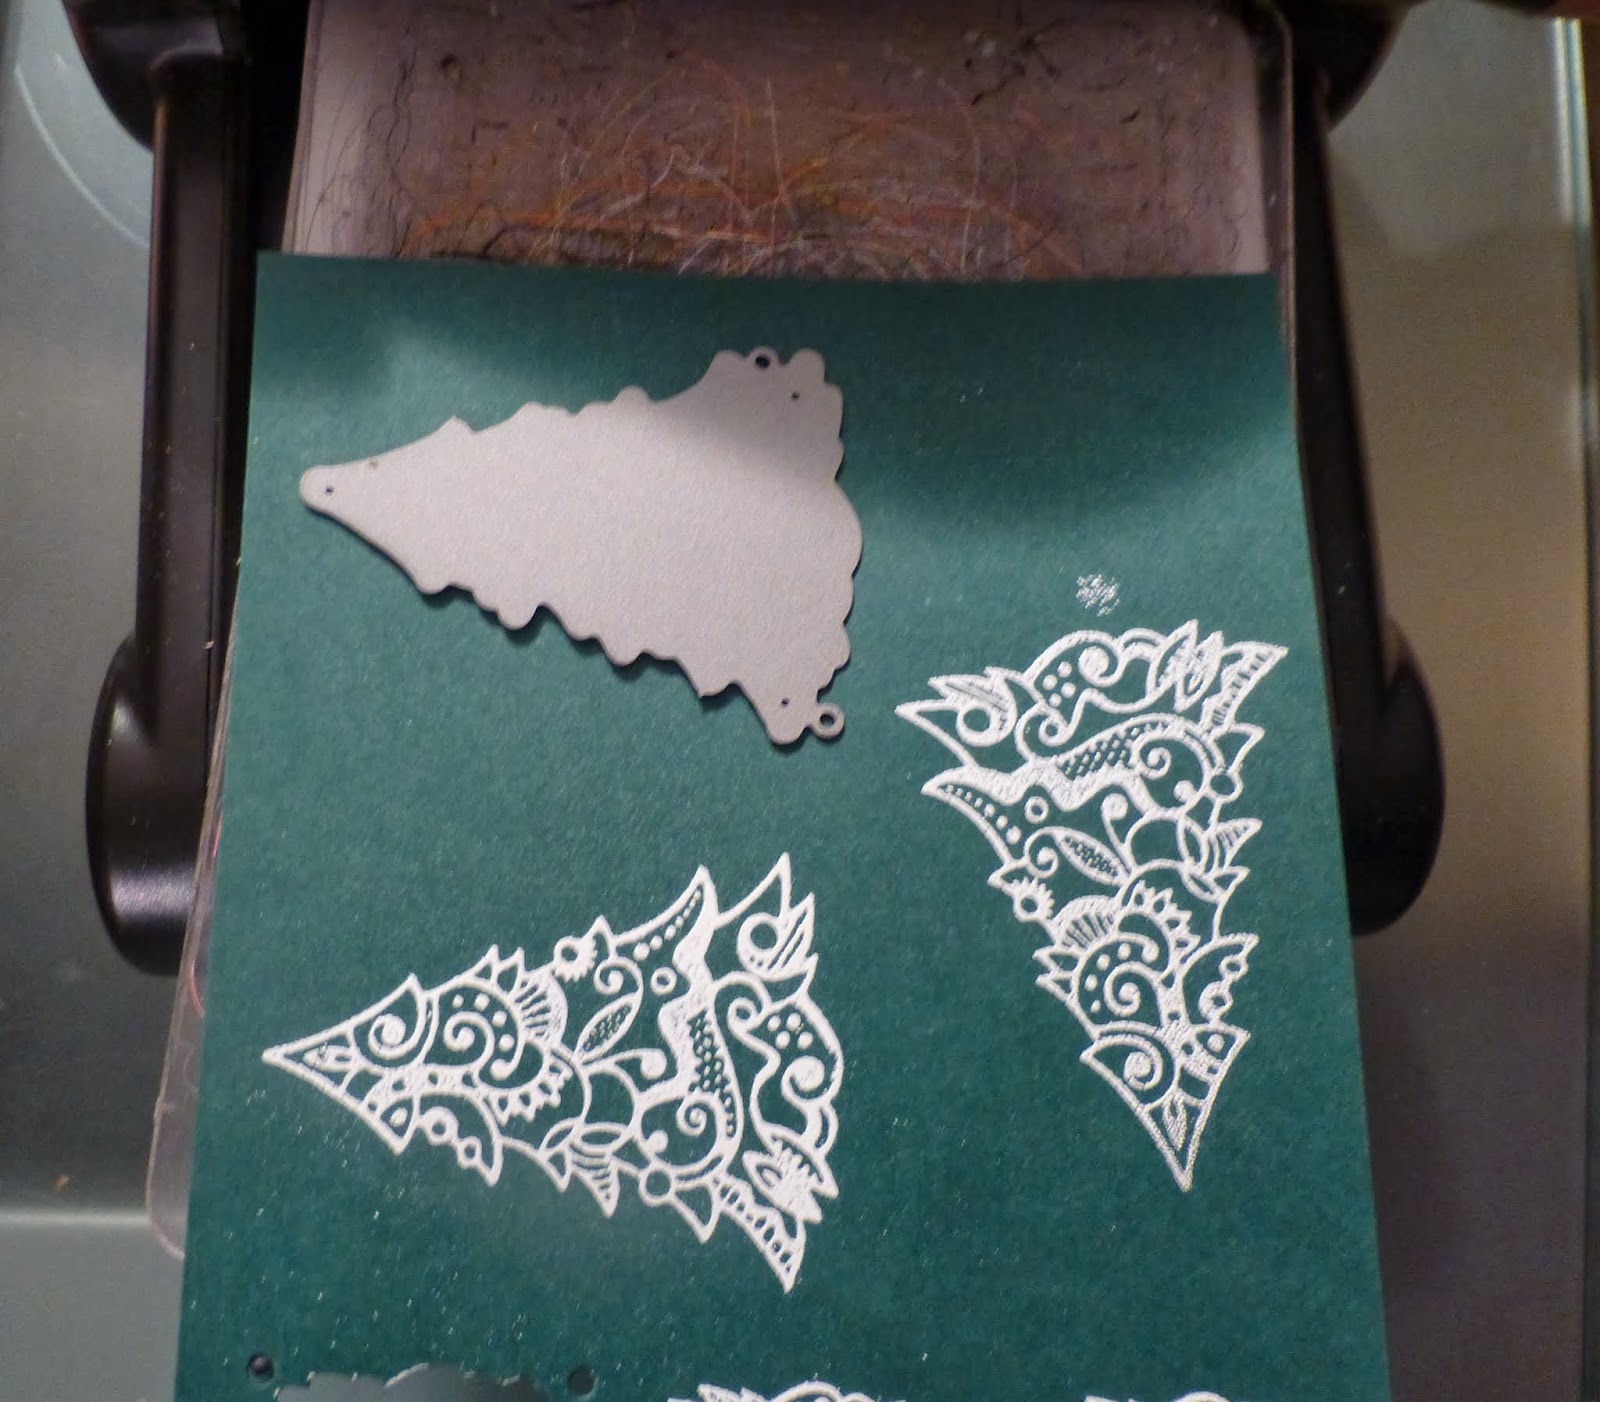
Gnome stamps and Random Doorway papers.
This time i had an idea of making  snow globe and
I want to share with you how I did it.

As you can see there is embossed paper and a place 
left to stamp. How to do this?

Start with apiece of heavy cardboard
and a shape you want to use. As I want to make'
a snow globe,I choose a circle.
Cut the circle with your die cut machine.If you do not
get through,use your scissors to cut out the shape.
If you use cardstock that is too thin you won't get the shape.

Safe the cut out form, for it there is another technique you
can do with using both sapes.
Now you make the sandwich as follows:
Put the paper inside the embossing folder you want to use
and the cardboard on top of it. You have to see what
plates to use depending on the machine you have.
When run through the machine the paper looks like this:
embossed outside and the circle for the globe in the middle.
Use the circle again to cut out another circle
out of  an acrylic sheet (like from the wrapping of your
die).Here too if it doesn't come right out, use scissor.

With white acrylic paint I paint the porders of the acrylic
circle and the embossed panelforthe card.
On top of the acrylic sheet I added some drops of
glossy accent and also around the circle. 
On top some glitter to give it a real snow effect. 
The white border  of the circle also  hides the foam
 tape you have to put underneath to fasten 
the globe to the card.
The parceland the gnome stamp have been stamped
on shrink platic to fit inside the globe. You see the
difference of size after shrinking with the parcel.
I stamped with black archival and colored with
Tim Holtz distress markers.
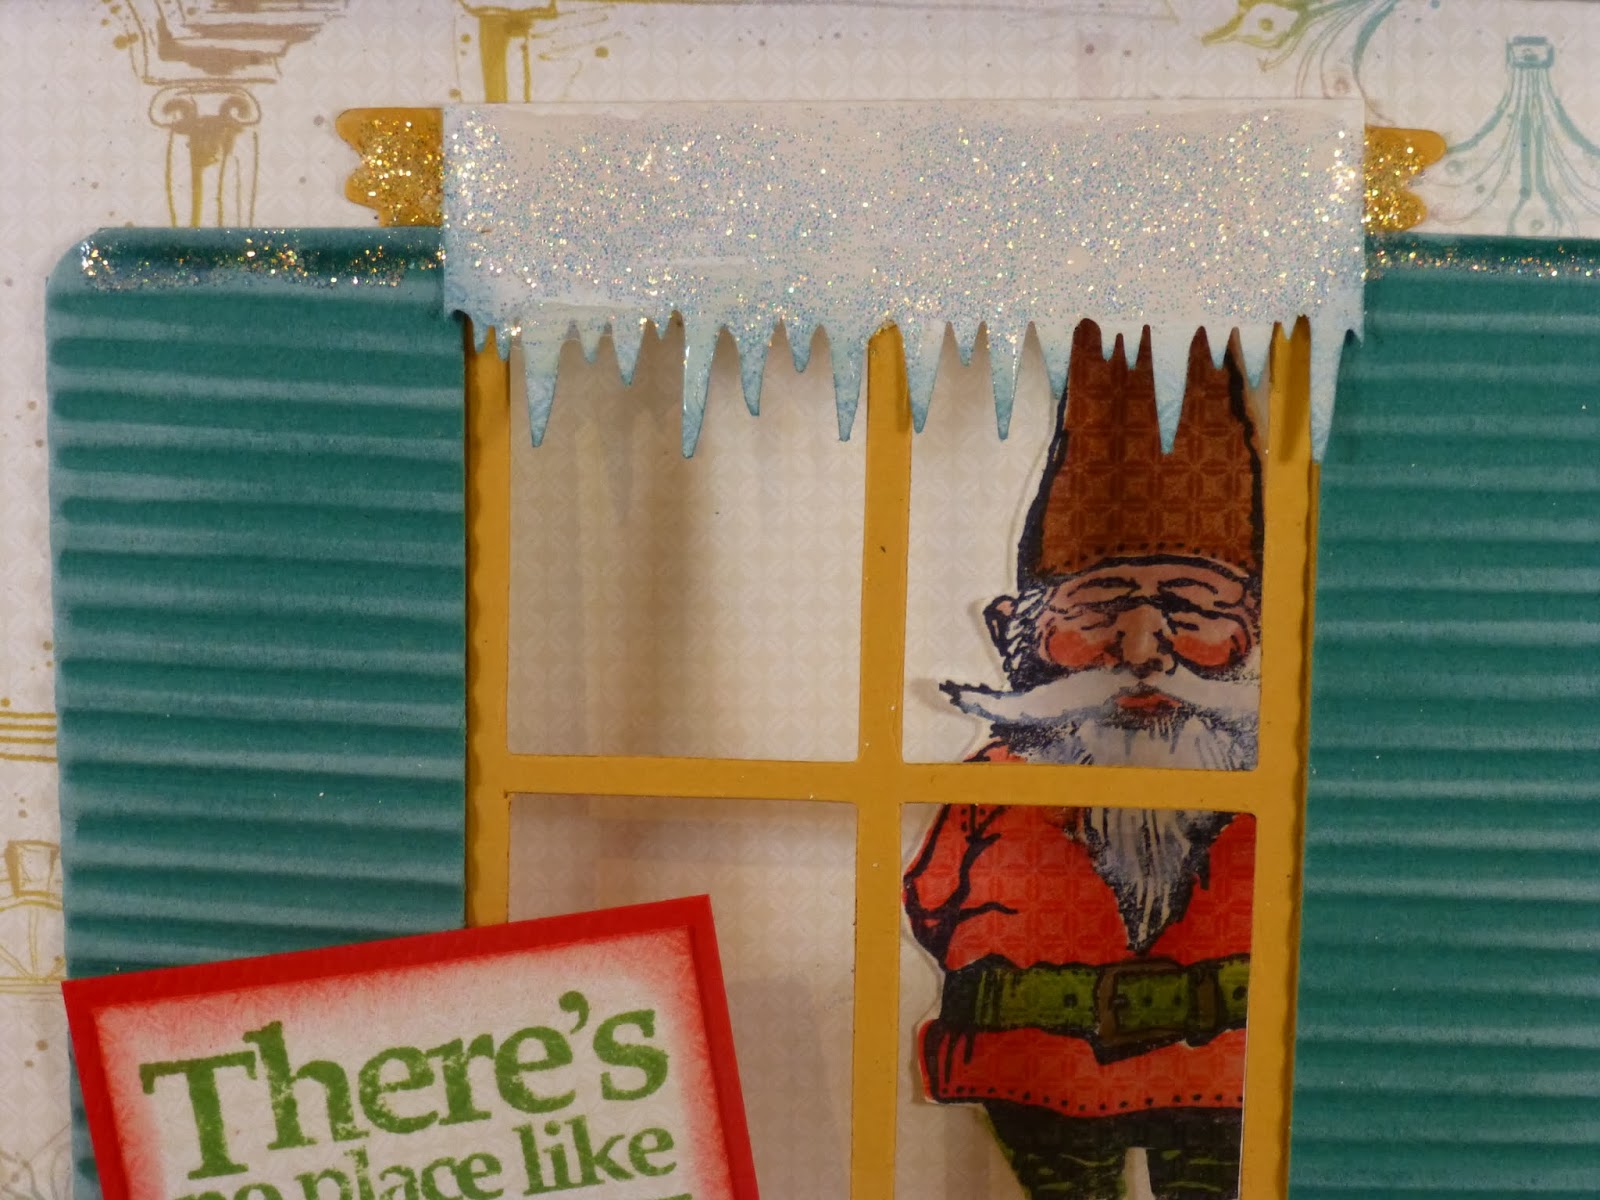
Here you see a close up of the finished globe,
behind the gnome you see an embossed tree
of Michael Stong.

Here another version of the card:
Here in the globe you see a die cut tree and
 the parcel inside.
The snow flke is a Tim Holtz die.
And this is the inside of the card.

As you can see the stamps can be used in many 
ways and as I need more cards to send, I am sur
I  will come up with more fun ways to use the stamps.

Have a creative day!


Monday, December 16, 2013

Club Scrap: Gnome Home

Still needing more cards to send,
so i keep on playing with my Club Scrap
Holiday Gnome stamps and came up with this idea.

I used Club Scrap Random Doorways for this card
and theTim Holtz window die on the front of the card
while the gnome is stamped on the inside of
the card. The shutters are made with a strip
of paper run through the crimper
and decorated with white ink to give it the snow effect.

The holly is stamped with green ink and the berries 
are little red sticky gemstones.
The top of the window is done as in my
previous post here,with a punch,ink, glossy accent
and glidder added on top.
And this is the inside of the card.
Imade sure the wish inside was right behind
the wish fromthe ouside,so you don't see
it when the card is closed.

I also added some holly als a little gemstone on the bottom.

I have some more ideas with the gnome,so do comebac tomorrow!


Have a creative day!